
Free Printable Color Your Own Christmas Treat Bag Toppers
I really love giving baked goods away at the holidays to all the people on my list that aren’t on my “list” if you know what I mean. I talking those teachers, neighbors, pastors, mail people and anyone else you need a nice gift for that doesn’t cut into your main Christmas budget.
I was trying to think of a way to jazz up a baggie of cookies while making them personalizable at the same time. That’s when I remembered using fold over bag decorations that I got from Hobby Lobby. They were really easy. But then I thought it might be fun to get my kid in on the whole process. My toddler helps me mix the ingredients (and eat the ones that “break”) so why can’t he finish the gift off by coloring the tag I put on it too? So I created these free printable color your own Christmas treat bag toppers for you to use to set up a fun activity with your child. They are simple to use.
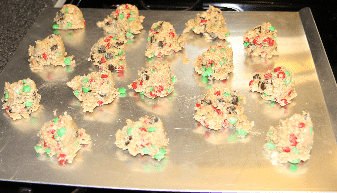
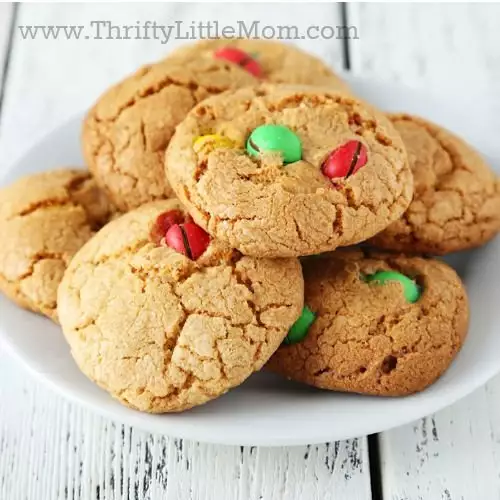
Step 1: Bake your goodies!
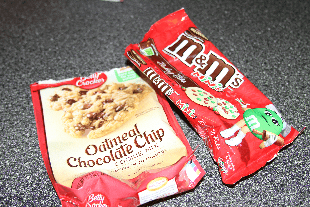
- For the cookies pictured I simply bought a pouch of chocolate chip oatmeal cookie mix and a bag of Christmas colored mini M & M’s.
- My son and I made them up in less than 15 minutes.
Step 2: Print Your Tags
- I highly recommend using cardstock paper to print these. Cardstock is a heavier thicker paper that will hold up better and look nicer.
- I have created 2 printable tag options. The links take you to Google Docs where you can print as many as you like.


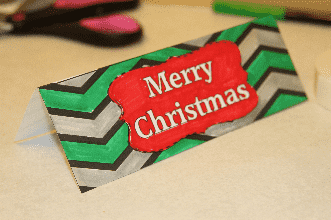
Step 3: Color Your Tags
- You and your child can go to town coloring these print out’s with crayons, markers or even colored pencils.
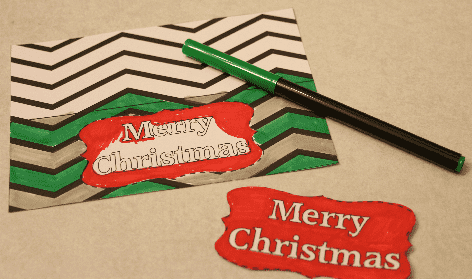
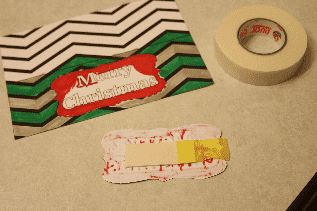
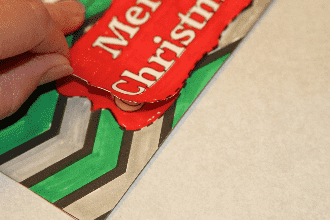
- If you decide that you want to make these 3-D simply color the “Merry Christmas” add on piece, cut it out and attach it directly on top of your chevron tag where it says “Merry Christmas” with a piece of double sided sticky foam tape.
Step 4: Fold Tag In Half
Step 5: Put cooled cookies in zip top baggies
Step 6: Seal up Zip Top Baggies
Step 7: Slide colored tag over the top of the zip top baggie.
- The tag should straddle the top of the zip top bag.
- I push the zip top bag all the way into the crease.
Step 8: Staple the tag to the bag on the left and right sides to secure it.
Step 9: Give them away!
I hope that you found this post helpful and fun for you and any child in your life. Please pass it along to anyone you may know who would enjoy this activity!
Kim Anderson


Kim Anderson is the organized chaos loving author behind the Thrifty Little Mom Blog. She helps other people who thrive in organized chaos to stress less, remember more and feel in control of their time, money, and home. Kim is the author of: Live, Save, Spend, Repeat: The Life You Want with the Money You Have. She’s been featured on Time.com, Money.com, Good Housekeeping, Women’s Day, and more!