
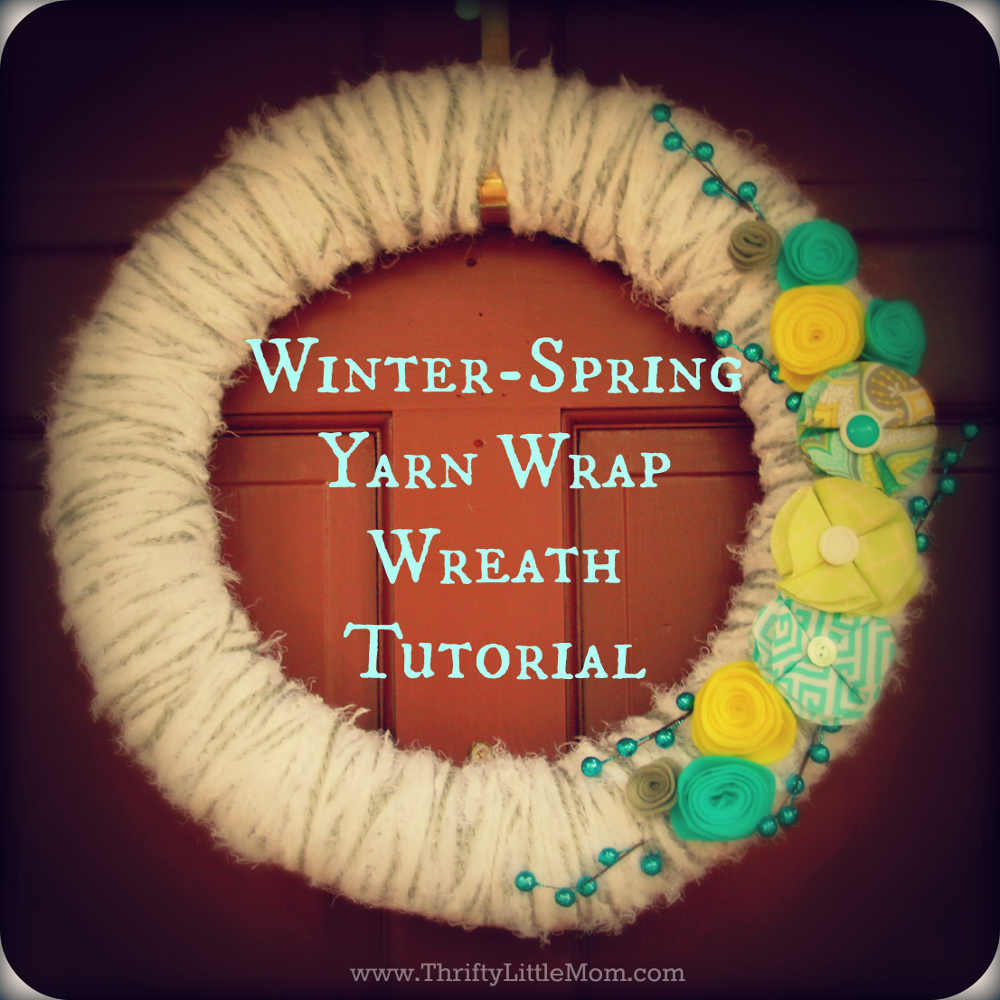
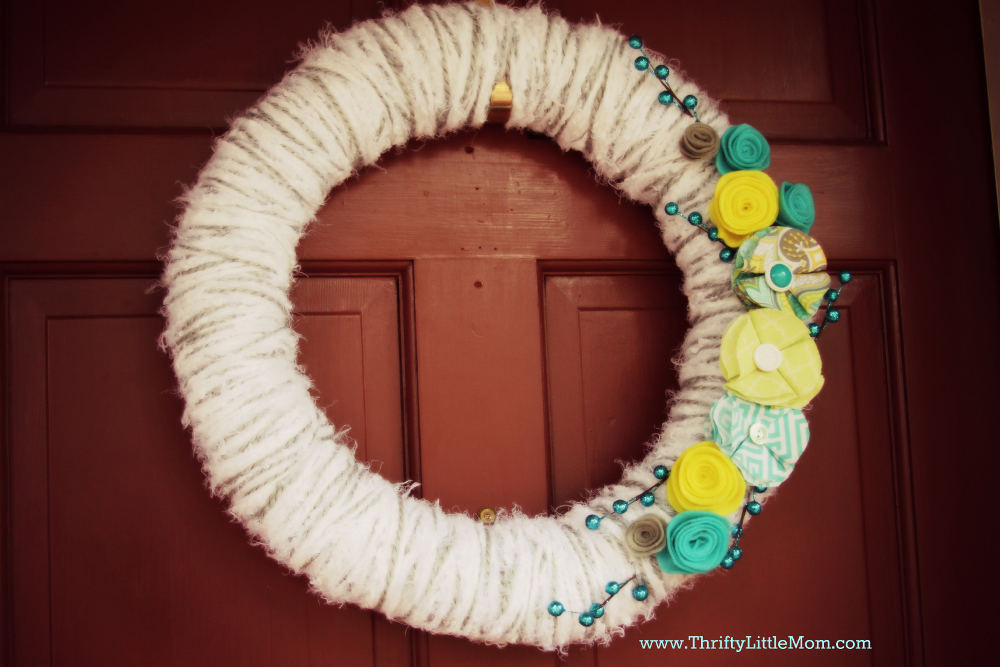
Winter/Spring Yarn Wrap Wreath Tutorial
To be honest, I’ve had the materials to make this wreath since the winter of 2011. That however is when my son was born and I have just now gotten back to the point where I feel like being my super crafty self again. I wanted to pick colors for my wreath that were perfect for winter but could also be perfect for spring. That means, all I need now is to make a summer wreath (so that should be coming in a few months).
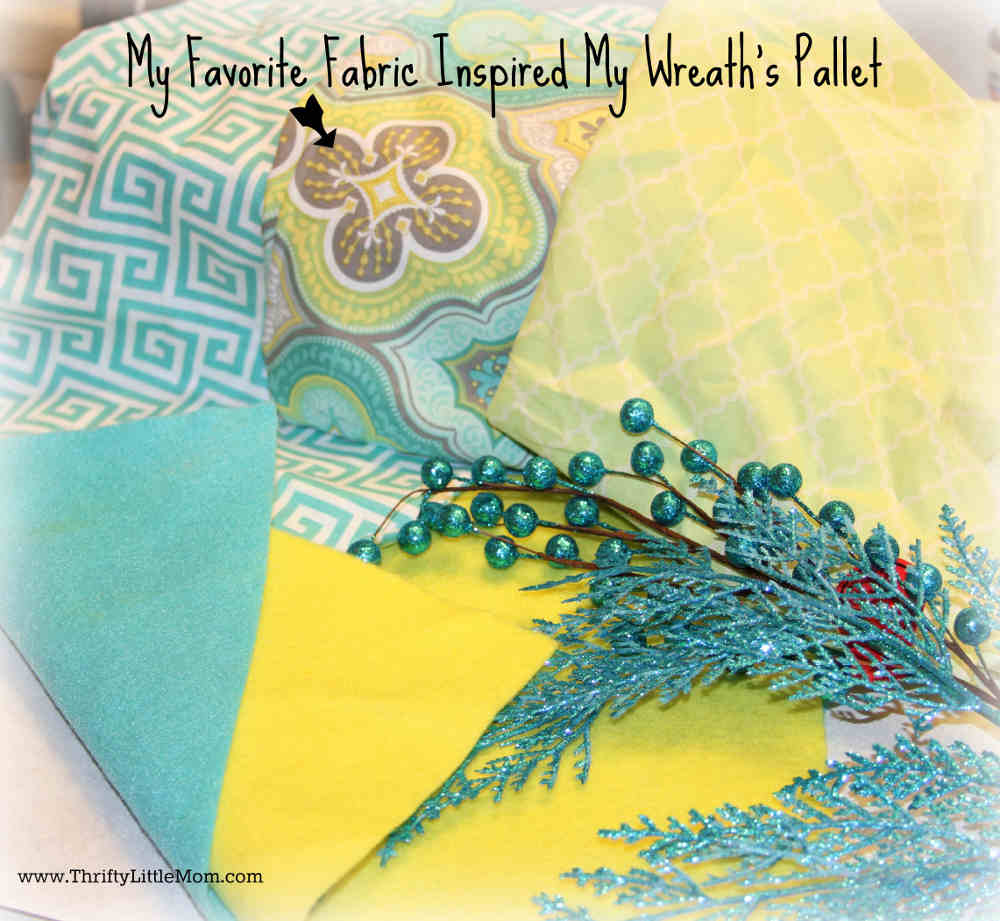
To form the color pallet for this winter/spring wreath I chose my most favorite fabric pattern from Hobby Lobby and built the entire wreath around it, picking coordinating colors and geometric patterns. Let’s begin!
Supplies:
- 40% off coupon from your local craft store website.
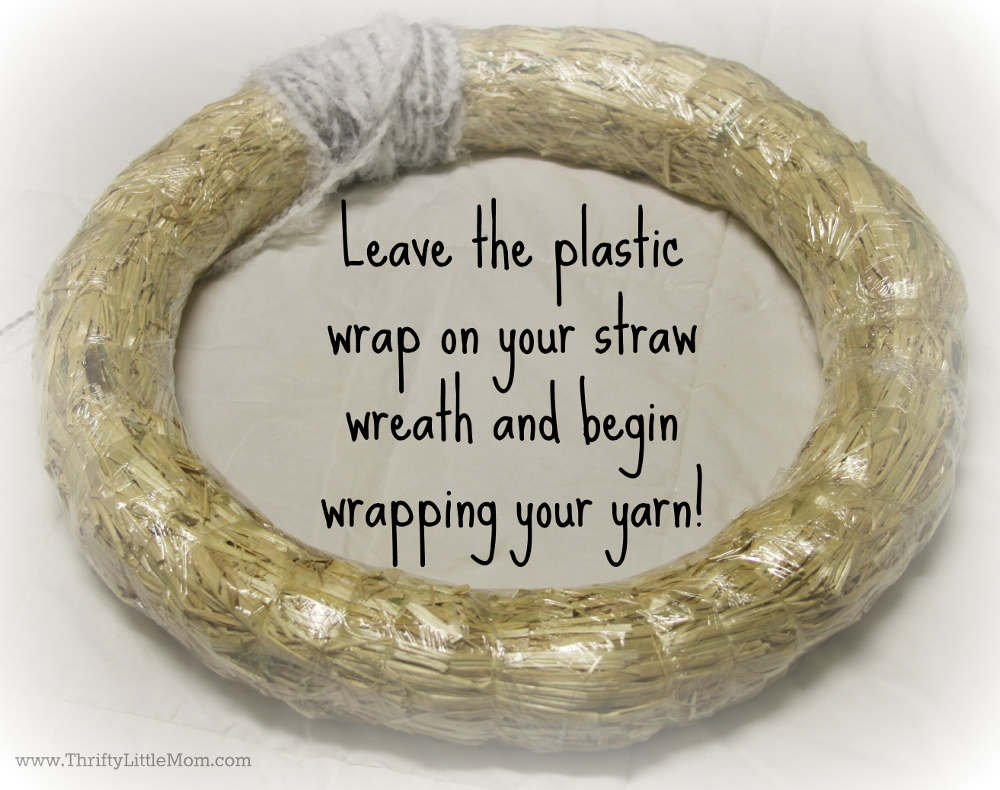
- 1 Straw Wreath
- 1/4 yard of 3 fun fabrics that you love!
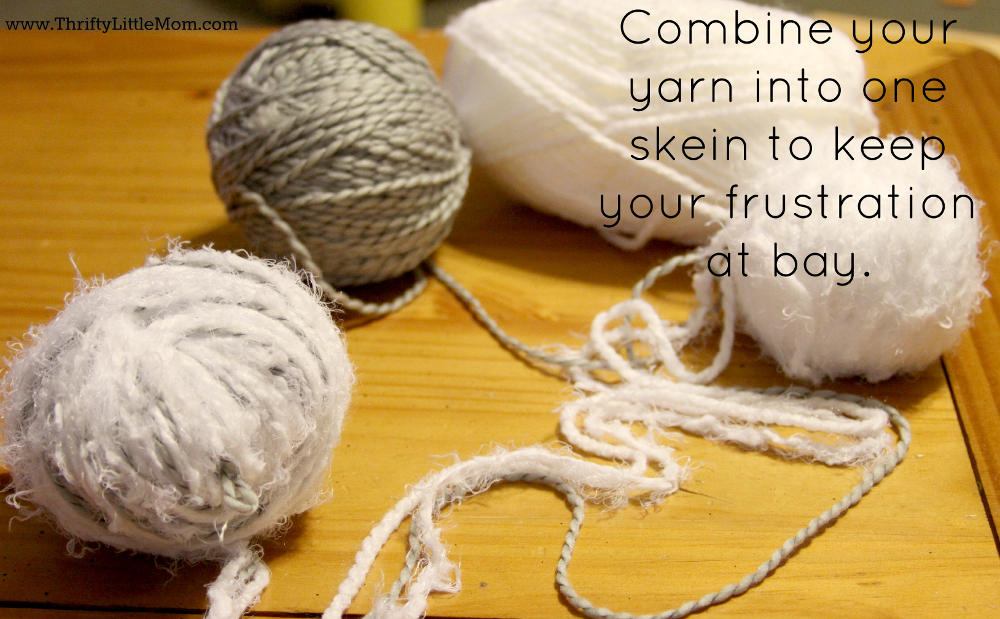
- 1 Skein of yarn for each color of yarn that coordinates with your fabric (I used plain white, fuzzy white and grey).
- Several squares of felt in coordinating colors to your fabric.
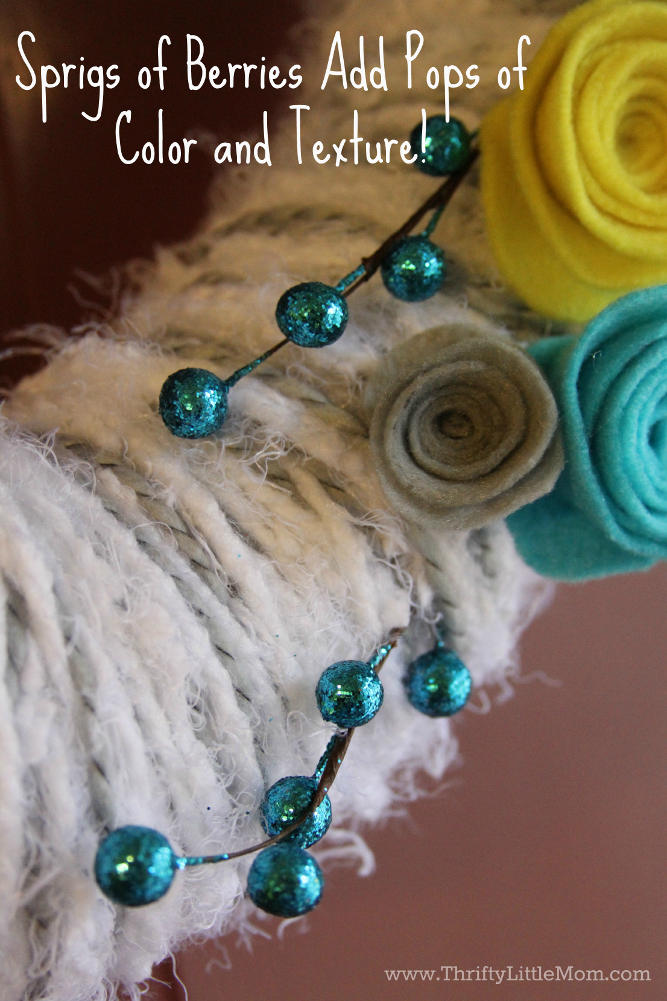
- Coordinating stems of berries from craft store floral department.
- Buttons in coordinating colors.
- Marker
- Various size drinking cups
- Scissors
- Hot glue gun and hot glue sticks
- Thrifty Tips: To bring the cost of this project down, consider using scrap fabric & felt that you may already have as well as yarn you may be storing. Thrift stores are great places to pick up yarn for far less than retail! If you don’t have these materials around, look for these items to be on sale at your local craft store.
Step 1: Get Your Yarn Worked Out
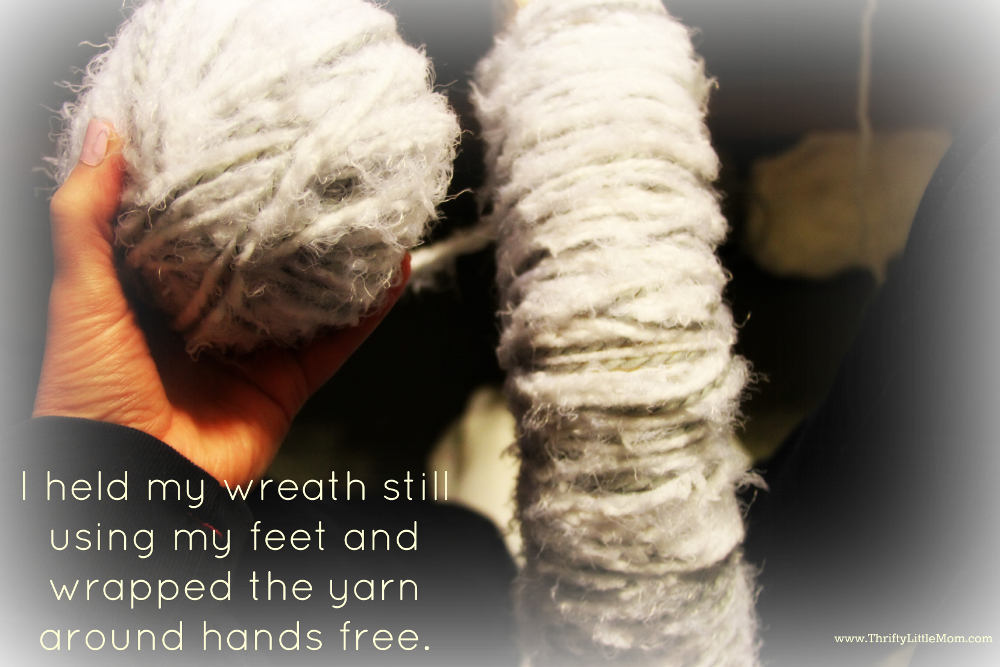
- To keep from giving up on this project a few wraps in, go ahead and take your 2-3 skeins of yarn and wrap them up together so that when you are done, you have 1 skein containing all your yarn combined. (If you don’t, you’ll be trying to juggle wrapping and keeping your separate skeins from tangling as you work.)
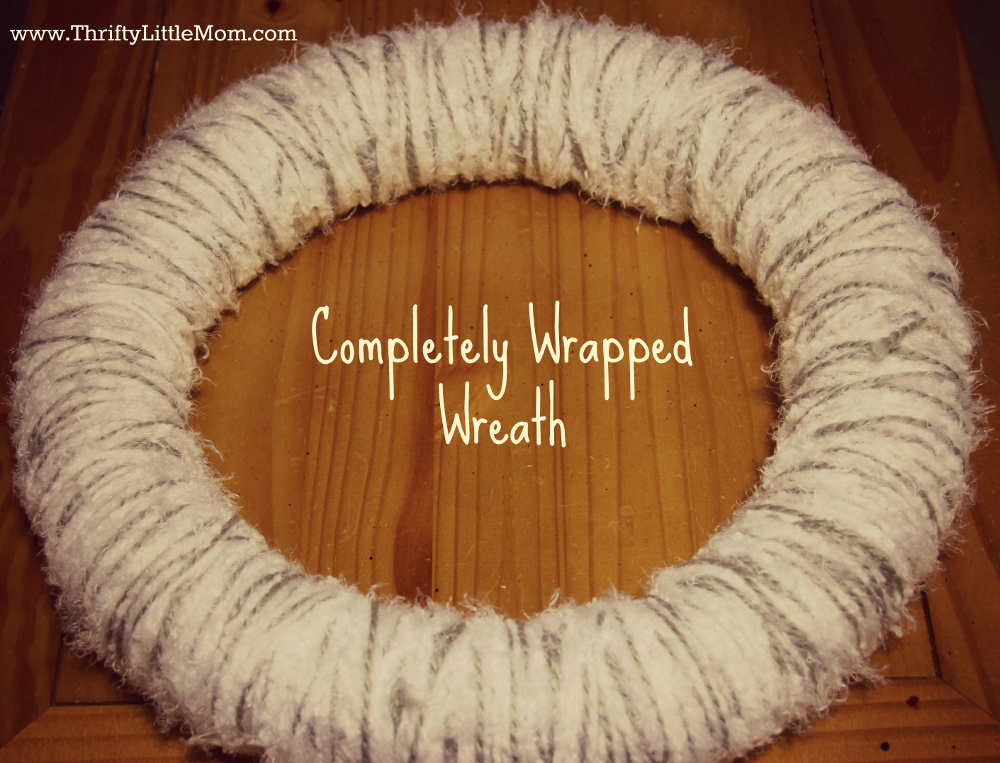
Step 2: Wrap Your Wreath
- Start by wrapping your combined yarn strings around the wreath.
- Tie the first wrap in a knot so the first loop around is secured to the wreath.
- Continue wrapping until you get all the way back the start and finish it by tying off your string just as you began.
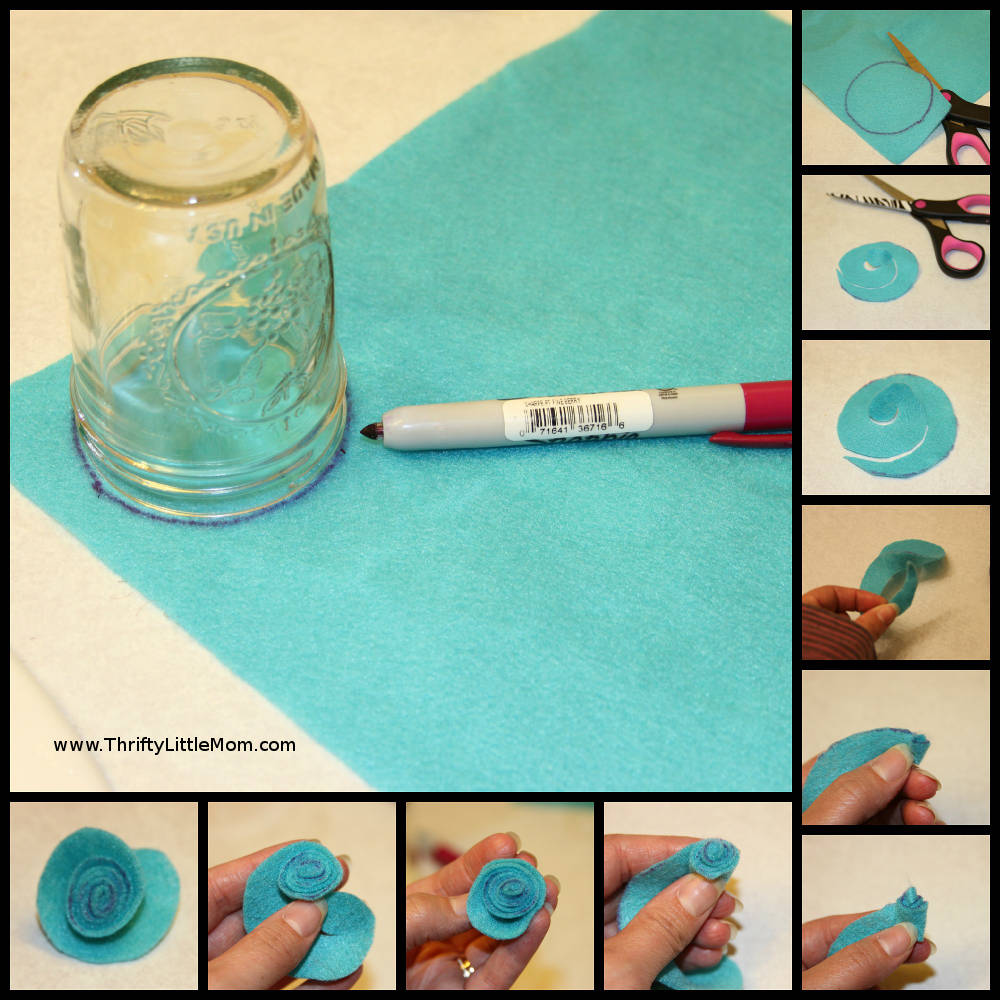
Step 3: Make Your Felt Flowers
- To make these flowers you simply cut a circle out of the felt and then cut the circle in a spiral pattern starting from the outside and cutting to the middle.
- Then you slowly roll the felt, starting from the outside and it will slowly form a little flower.
- Add a dab of hot glue on the bottom of the flower and cover it up with the small piece of felt that is left from the center of your circle.
- Sizes: To make different sizes of felt flowers, cut out larger or smaller circles of felt.
Step 4: Make Your Fabric Flowers
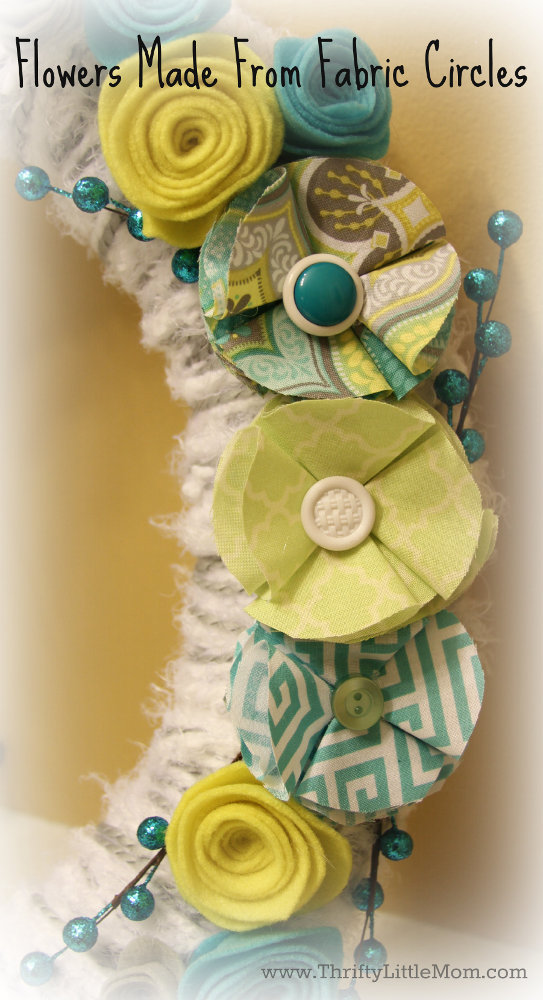
- I made three different fabric flowers.
- You simply cut the fabric into 8 circles and then fold the circles up as shown in the pictures and diagrams below.
- Each circle makes one triangular looking petal.
- I shot a little hot glue down in the fold of the petal to keep it from unfolding as I worked.
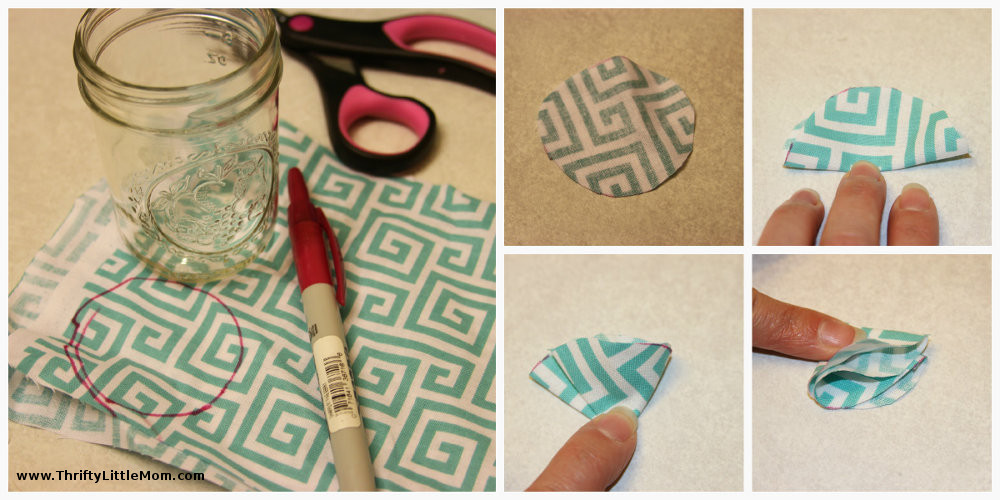
- Once all your petals are made cut a small circle of felt to be the base to glue the petals down to.
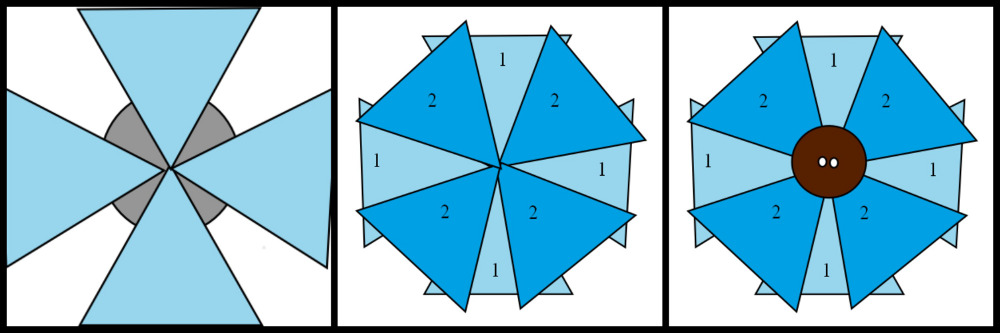
- Each triangle in the diagram below represents a fabric petal.
- Layer 1- Hot glue 4 petals down to your circle of felt.
- Layer 2- Hot glue 4 more petals down to the first layer, in-between the Layer 1 petals.
- Layer 3- Hot glue a coordinating button to make the middle of the flower.
Step 5: Arrange Your Pieces
- Once all your flowers are done, begin arranging them on the wreath.
- Once you get the look you want, pick each item up from where you have placed them one by one and hot glue them down to their spots on the wreath.
- I love the look of adding simple little berries to these yarn wrap wreaths. I chose the sparkly teal ones to accent all the teal in the fabric and add a pop of color!
Step 6: Hang it up for the world to enjoy!


Kim Anderson is the organized chaos loving author behind the Thrifty Little Mom Blog. She helps other people who thrive in organized chaos to stress less, remember more and feel in control of their time, money, and home. Kim is the author of: Live, Save, Spend, Repeat: The Life You Want with the Money You Have. She’s been featured on Time.com, Money.com, Good Housekeeping, Women’s Day, and more!