
Up-cycling Thrift Store Plaque Art
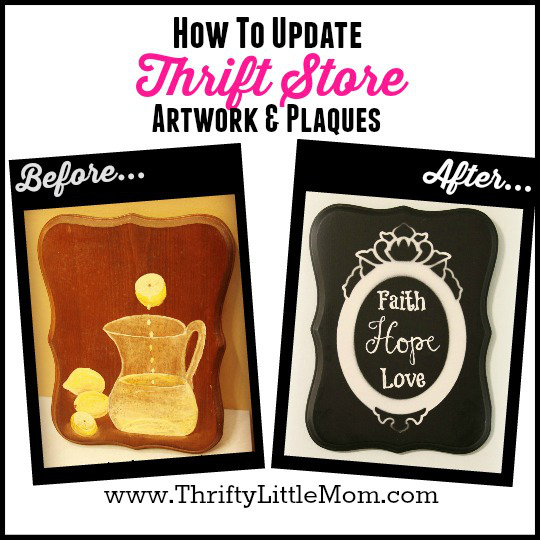
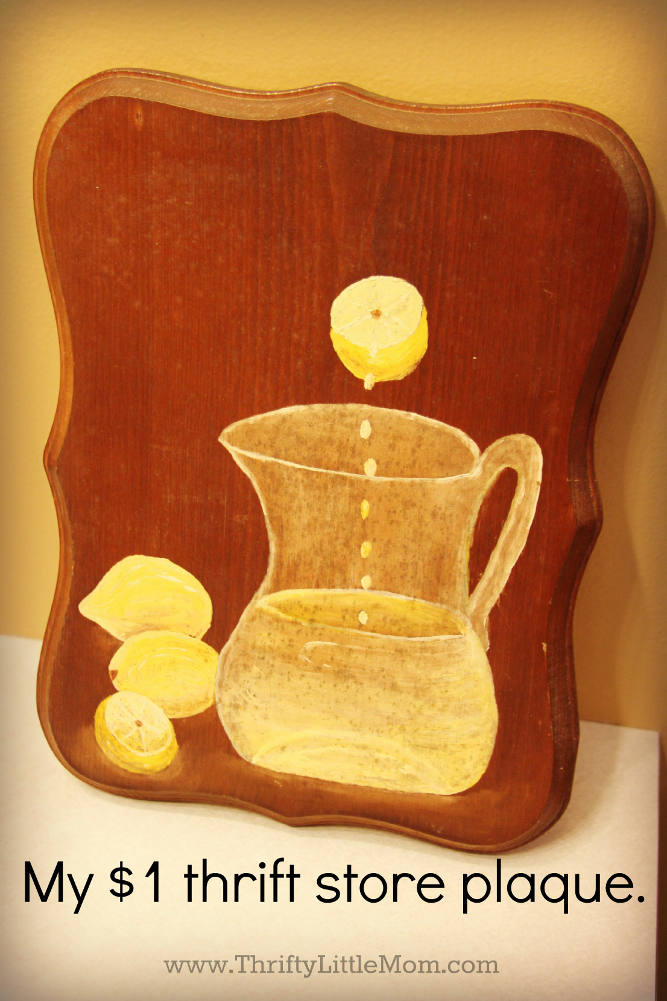
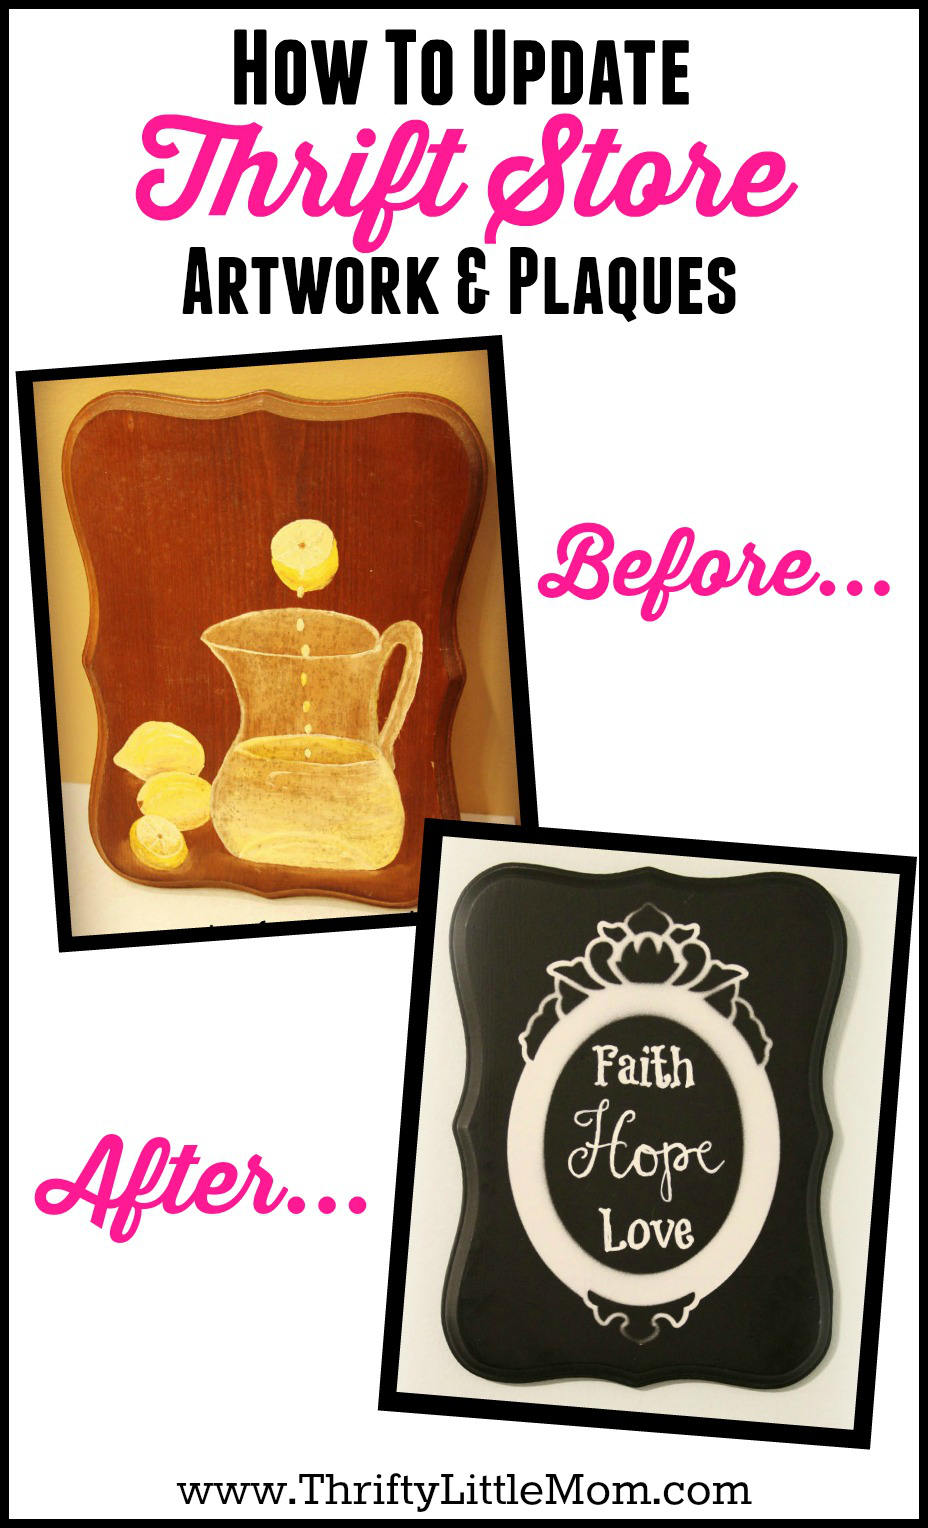
After spending so many hours on Pinterest, seeing the creativity of people out there who can take a piece of trash and turn it into treasure I’ve been on a quest to find a project that would be functional in my own home. Two weeks ago I was venturing down the isles of my favorite thrift store and ran across this adorably shaped little plaque with someone’s artwork on it. That artwork doesn’t exactly go with my decor, but the wood and the shape was fabulous and I saw potential. Plus it was only $0.99!
Then on my latest wandering through Michael’s craft store I ran across some fabulous flat metal frames for $2 in their “dollar-ish” stuff section. Those had some potential too! So I gathered the following supplies with a project in mind and I’m happy with the outcome!
Supplies:
- Thrift store or craft store wooden plaque. (If you want to try this but can’t find a wooden plaque at your thrift store, Micheal’s has some really cute wooden plaques right now that are less than $5. Don’t forget your 40% off coupon).
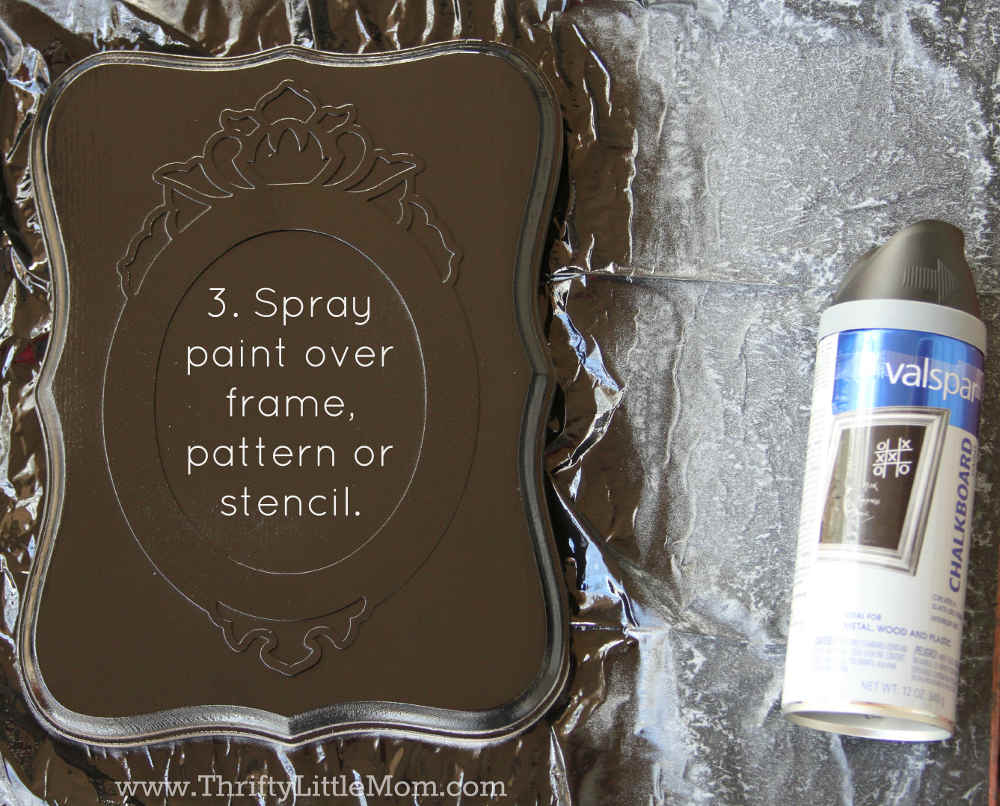
- Black Spray Paint (I used chalkboard paint, because I had it, but if this won’t be a chalkboard, buy the cheap black matte paint).
- White Spray Paint
- A cool pattern or stencil that inspires you.
- A paint pen in a contrasting color like white.
- Trash bag or paint tarp.
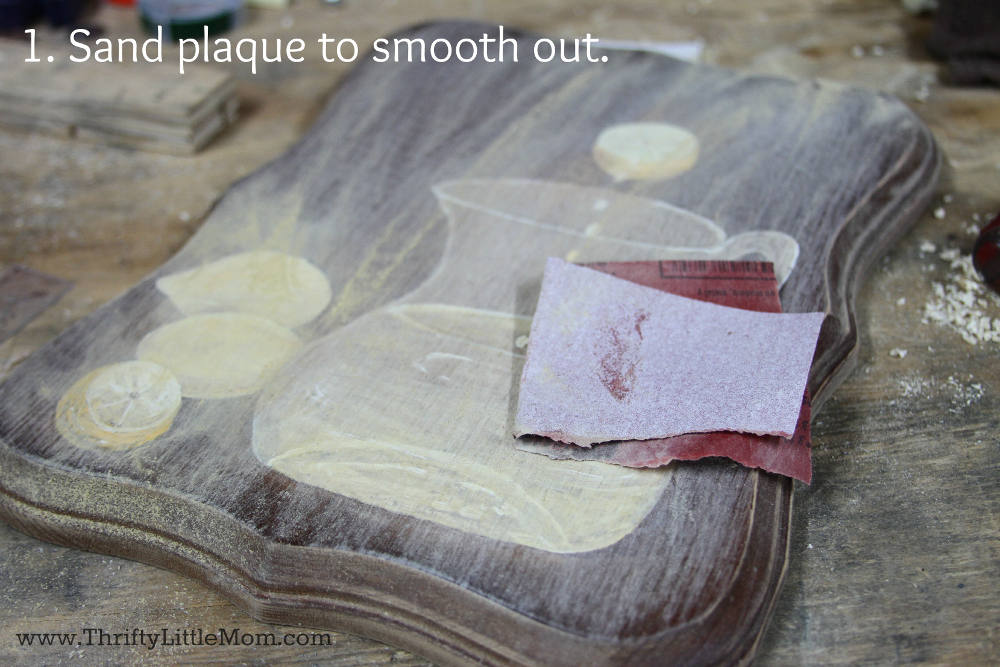
Step 1: Prep your thrift store frame by sanding the wood really good. You won’t get the all the previous paint off, but you want it to be smooth and flat to the touch when your done sanding. Clean off the sanding dust with a moist towel or rag.
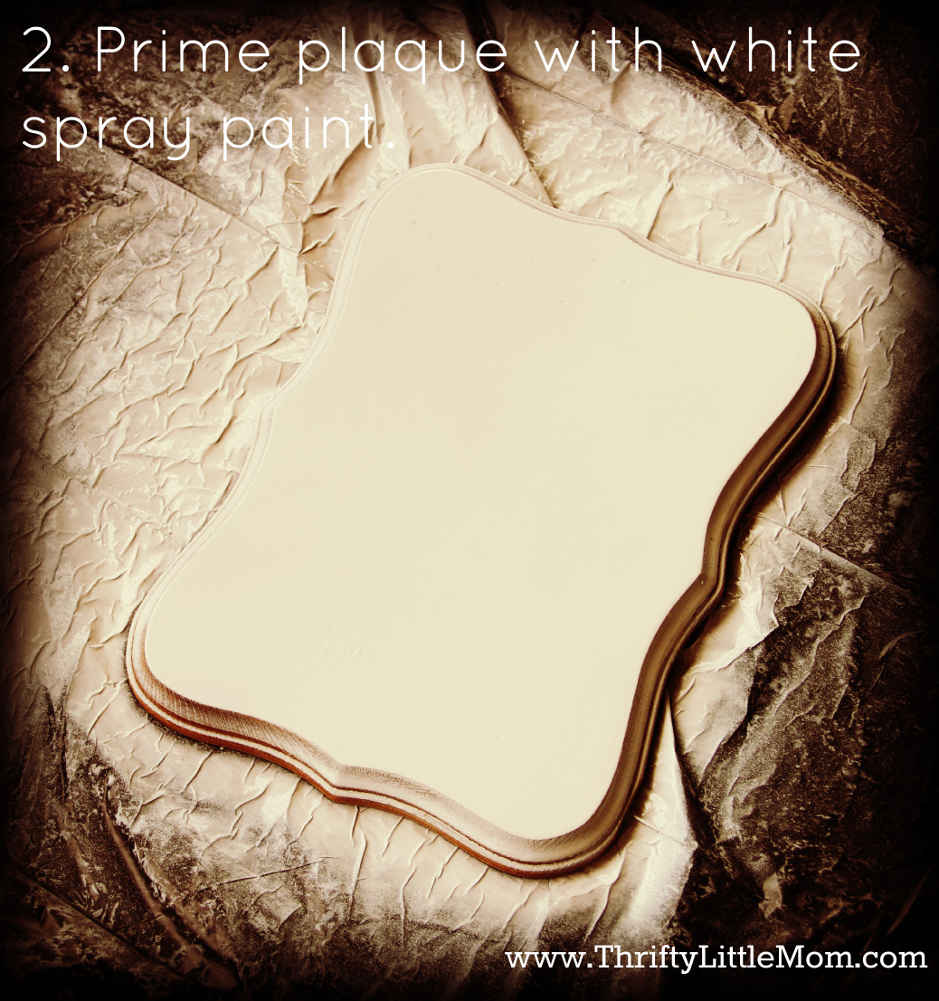
Step 2: Lay your plaque down on a trash bag and spray the back with black paint. Let it dry. Then flip it over and paint the front with a 2 coats of white paint. Let each coat dry completely. (I didn’t think about painting the back before I started on the front and smudged up the front a little when I decided to paint the back last.)
Step 3 & 4: Lay your pattern or stencil down onto your piece and spray 2 coats of black paint without moving or nudging your stencil. Be sure you paint the sides of the plaque. Let each coat dry completely.

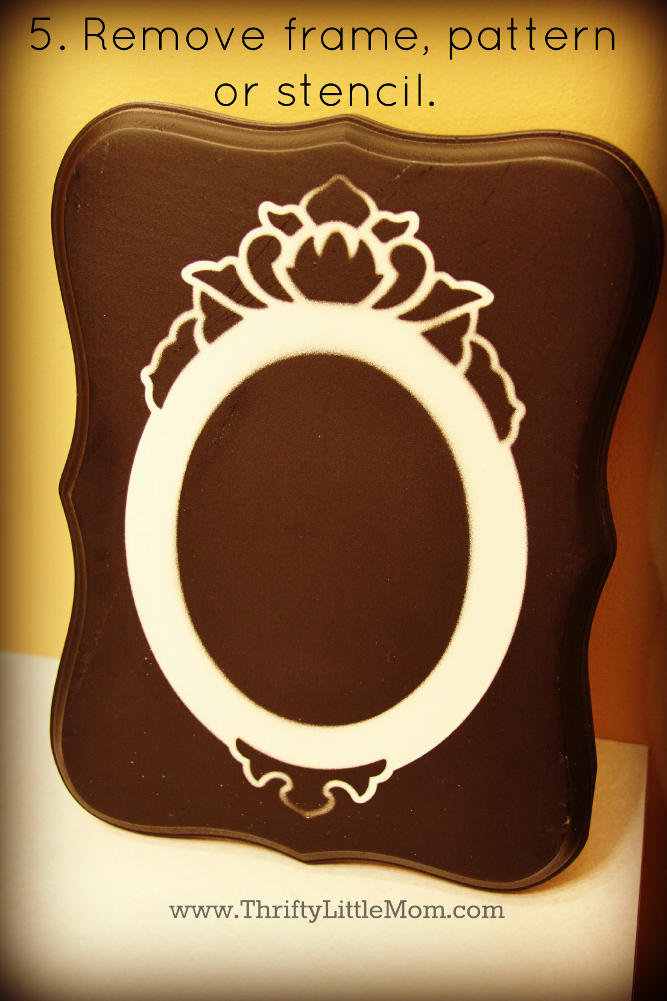
Step 5: Remove your pattern/stencil.
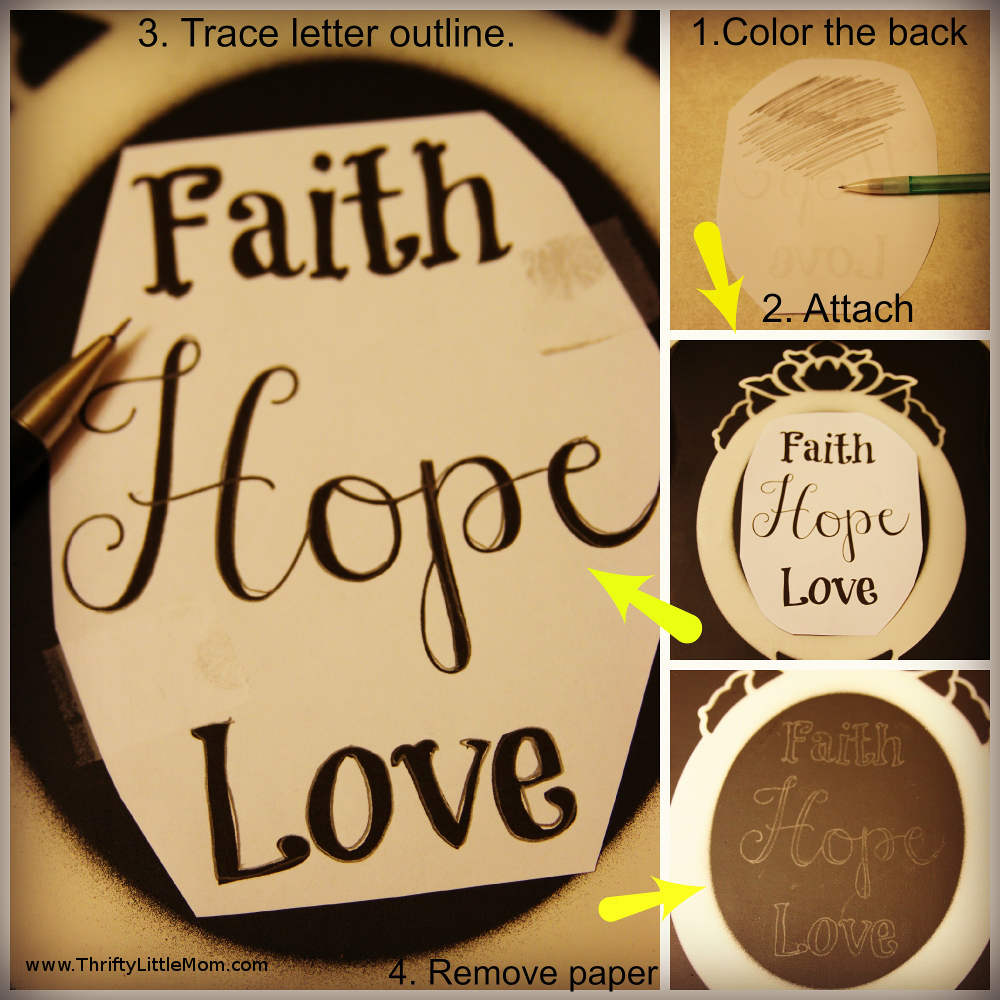
Step 6: Print out your favorite words, scripture or inspiration and cut it down to size to fit onto your piece (see picture of steps 6-9 below, following path of yellow arrows).
Step 7: Shade that back of the printed words with a pencil.
Step 8: Flip it over and secure the paper down to your frame with a gentle tape.
Step 9: Trace the letters with a sharp pen or pencil and the graphite on the back of the paper will work like contact paper, leaving the outline of your words visible.
Step 10: Fill in your words with a white paint pen. It will take a few coats, similar to using nail polish. Be patient and let each layer dry.
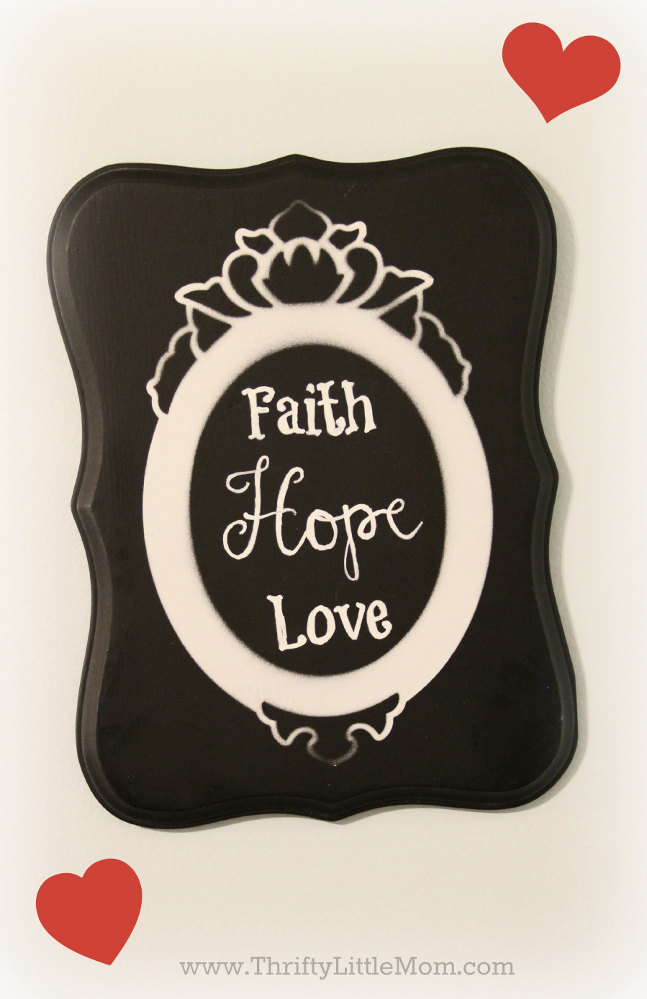
Step 11: Hang up for the world to see!
Please feel free to share any pictures or links to projects you have up-cycled like this in the comments section below!

Kim Anderson is the organized chaos loving author behind the Thrifty Little Mom Blog. She helps other people who thrive in organized chaos to stress less, remember more and feel in control of their time, money, and home. Kim is the author of: Live, Save, Spend, Repeat: The Life You Want with the Money You Have. She’s been featured on Time.com, Money.com, Good Housekeeping, Women’s Day, and more!