Reclaiming Your Storage Space in 3 Simple Steps
Sometimes when I look at those fancy kitchens in the magazines, I get a wee bit jealous. You know, the ones that have the advanced organization systems where all the dried goods are sorted into matching stainless steel containers…in drawers…with perfect labels?
My kitchen doesn’t have a pantry and I’ve got one of those awkward corner cabinets that you could fit a 5th grader in if only the opening wasn’t so ridiculously tight. A few years ago I decided that a kitchen remodel just wasn’t in the near future. That meant I had to get to the root of my dissatisfaction. The root was too much stuff.
When we own too much stuff and the important stuff is not properly organized, we start struggling with contentment concerning storage, house size or space. When those feelings start to surface, it’s time to evaluate your storage real-estate. Your storage situation may be better than you think once you get rid of the stuff that just doesn’t belong. I’m here to help you do that. Let’s get to reclaiming your storage space in 3 simple steps.
1. Take It All Out & Sort It
The only way you can figure out what all you have stored in those nooks and crannies is to drag it all out and sort it. If it’s the kitchen you’re reclaiming, that means putting mugs with mugs, utensils with utensils, appliances with appliances and so on. I’m talking literally pull EVERYTHING out and put in on the floor in your living room. The cabinets or storage space should look like they did when you first moved in.
2. Purge
- How many coffee mugs do you actually need?
- When was the last time you used those plastic fountain drink cups from the gas station?
- Do you avoid using a particular kitchen appliance because it’s just too hard to clean?
Purging is really hard for me personally. My husband and I did this project about 3 years ago and getting rid of 2 of my 4 plastic iced coffee straw cups was painful. Deep inside I knew that if I just let go of clutter, I could find peace and contentment with the kitchen I already had. The desire for an organized space outweighed my love for my stuff. I purged 1/3 of the items in my kitchen. If you asked me today what I purged, I couldn’t tell you. That’s how important ALL those THINGS were.
1 Year Rule
If you haven’t used it in a year and it isn’t too expensive to replace, consider just ditching it, donating it or selling it. Just get it out of your house.
How many do you need?
If we use coffee mugs each morning, we need a max of 4 mugs. More mugs than that and my sink piles up because I just don’t have to wash them.
This is the same with clothes. Do you find that your laundry gets piled up because in truth, you have so many clothes that you could go a month without doing laundry and be okay?
In most cases I cut down my collections of same items in half. Look through all those random items you have collected that seem to self-replicate in the cabinet. Try and cut them in half. Remember- you can re-wash it each time you use and put it back up in your cabinet.
Why are you holding on to it?
Sometimes we have stuff on in our storage areas for sentimental reasons. Some items were gifts. If you are holding on to something for an emotional reason, then you need to stop and figure out why. Memories are in your mind, not in your physical objects. Gifts are nice if they benefit your life and don’t steal contentment from it. Ask yourself why the items deserve a spot in your storage? If you have a good reason, keep them. If you don’t have a good reason, give them a new home outside of yours.
3. Reclaim Your Space- With Sticky Notes
This idea came from my engineering minded hubby. It worked for us so I’m going to share it. When you get ready to put everything back in your reclaimed spaces, decide how much each space is worth.
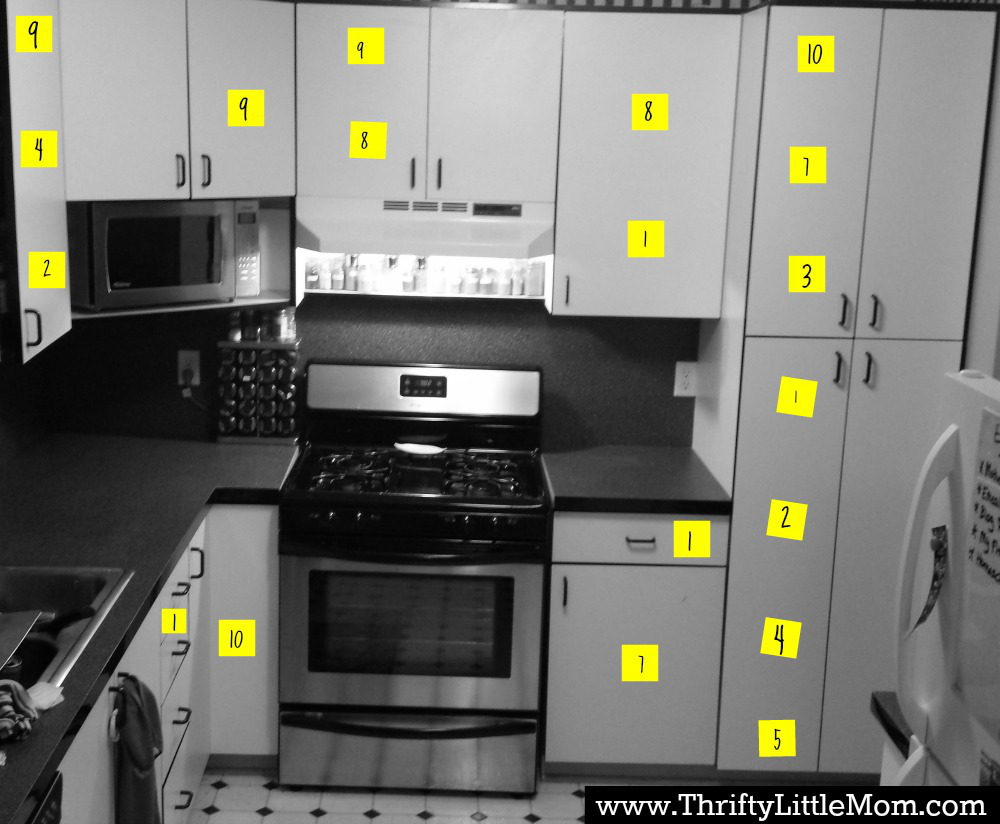
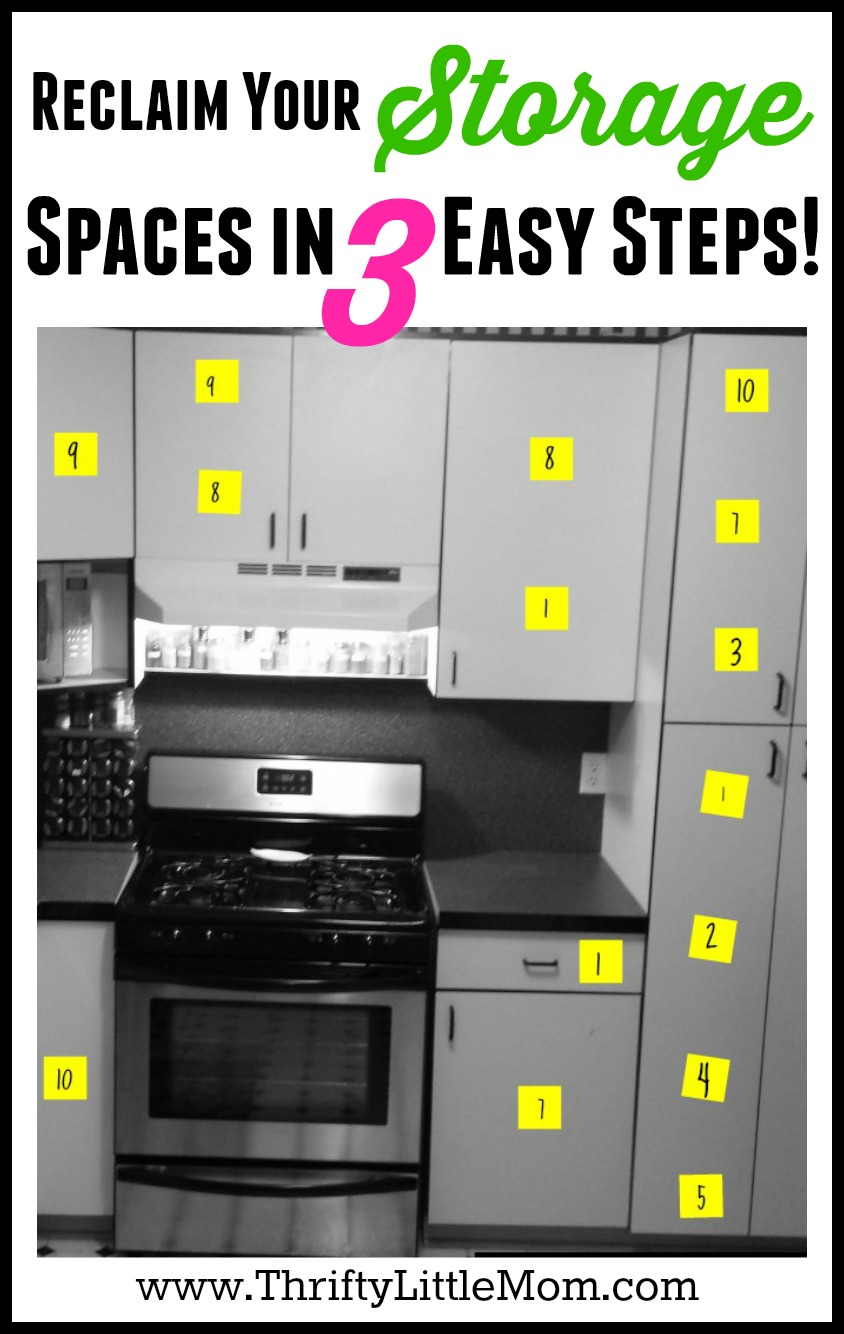
On a scale of 1-10, how convenient and important is each area. 1 being most important and 10 being a space you rarely use. Go from cabinet to cabinet and drawer to drawer thinking about how important that space is. Write a number on the sticky note and attach it to the cabinet. I created a little diagram I made of my kitchen so you can see what I’m talking about. You could do this with any storage space in your house though.
Once I had the whole kitchen marked, I divided my post-purge kitchen items into piles according to how often they get used and then started putting everything back in their new homes.
The cabinets I can’t reach without a step stool have higher numbers because they aren’t easily accessible. That means stuff like formal dinner wear and deep friers can go in those kinds of storage spaces. Everyday items like pots, pans, cups, plates need to be in easily accessible storage spaces so I put them on shelves marked with 1-4 scores.
Keeping It Clean
Once you get all your items back in their new de-cluttered spaces make a rule for yourself. Anytime you get a new item that is a duplicate, you’ll purge the old one. This will help keep you from getting back the point where you were when you started.
I hope that you found some of the ideas in the post helpful. It’s a big job, but once you complete it, you might just find a little more contentment with what you already have just like me.

Kim Anderson is the organized chaos loving author behind the Thrifty Little Mom Blog. She helps other people who thrive in organized chaos to stress less, remember more and feel in control of their time, money, and home. Kim is the author of: Live, Save, Spend, Repeat: The Life You Want with the Money You Have. She’s been featured on Time.com, Money.com, Good Housekeeping, Women’s Day, and more!


