
How to Choose a Hallway Coat & Shoe Storage Solution
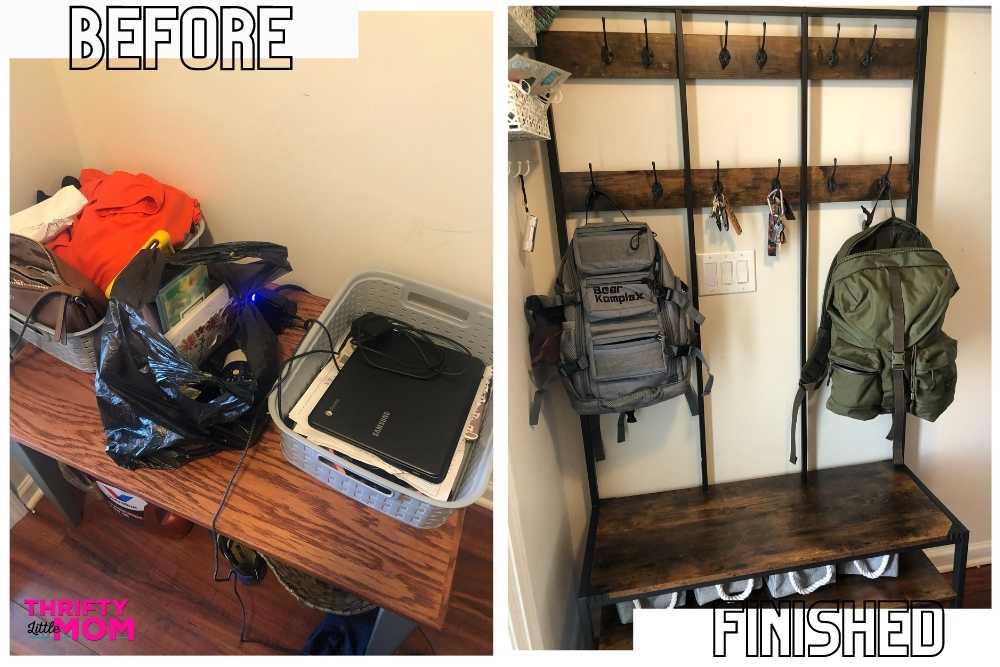
If you are anything like me you have a busy family with bags, keys, all kinds of shoes, and coats. One of the most frustrating ordeals we deal with is not being able to find anything on the way out the door because it’s spread throughout the house. Sometimes it’s just a mess in our entryway where everyone dumps all their things on the ground. I decided to break down and just get something that would solve all our entryway storage issues. In this post, I’ll show you how I set up a hallway coat and shoe storage solution in about 1 hour.
In this post, I’m going to walk you through each step of the process as well as showing you what I ended up choosing for my own!
Steps for Getting the Right Hallway Coat & Shoe Storage Solution For Your Home
Step 1: Measure
If you have an area of your house that you are considering using for your hallway coat and shoe storage then you’ll want to get out the measuring tape or the measuring tape app on your phone and figure out how much space you have to work with.
You are looking for how much height, width, and depth you have to work with in your space. Knowing this information helps you while you are looking for the right solution. It can help you weed out hallway coat and storage solutions that won’t fit in your space.
Step 2. Decide on Aethetics
Most people have some kind of “feel” they are going for in their home. There will be things you will find online, in store, or wherever you are that you will be drawn to or find aversion to.
Go with your gut and go with something that looks attractive to you but more importantly — solves your hallway coat and shoe storage issues.
Keep anything that is common already in your mind when you are looking for your storage solution. Are most of your home accents silver, gold, brushed bronze, black, light wood or dark wood? Being aware of these small details can actually make a big difference in how your piece fits your home.
I liked the industrial look of this Vintage Hall Tree with Hanging Hooks and it seemed appropriate for the size of the space that I had.
I’ve compiled this list to help you see what I mean.
Hallway Coat & Shoe Storage Aesthetic Examples
Since we are talking aesthics, I wanted to give you a few examples of what I mean.
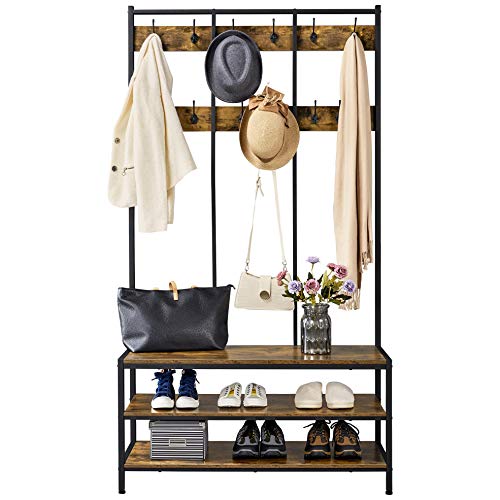
YAHEETECH Coat Rack Shoe Bench Vintage Hall Tree with Hanging Hooks,, Large Size, Rustic Brown
This is the one that I chose and was able to build in about 1 hour. This matches the look and feel of my house.
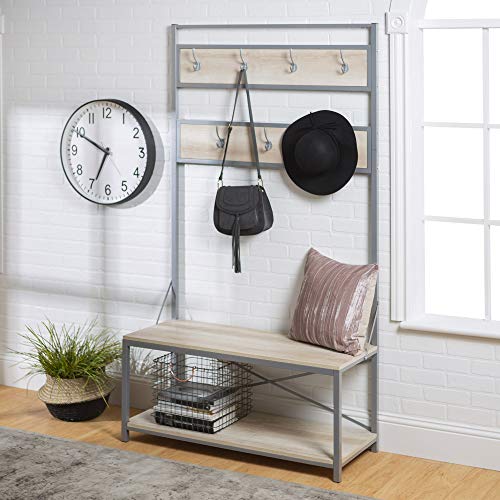
Walker Edison August Modern Farmhouse X Back Hall Tree with Bench, 72 Inch, White Oak
Notice that this one still has an industrial feel but it's much lighter in color.
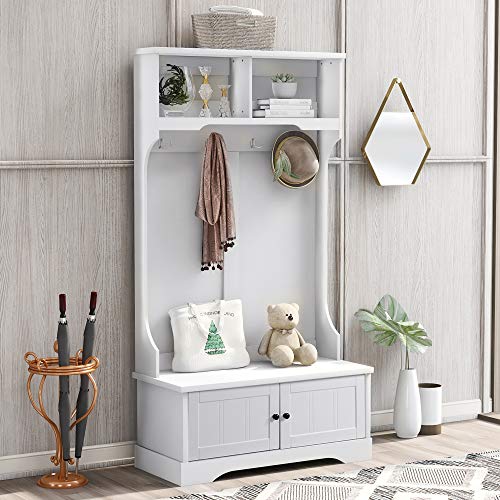
P PURLOVE Hall Tree with Storage Bench, Entryway Bench with Shelves Cabinet and 4 Hooks, 3-in-1 Design, White
Notice that this piece in white has that farmhouse feel if that is what you are going for.
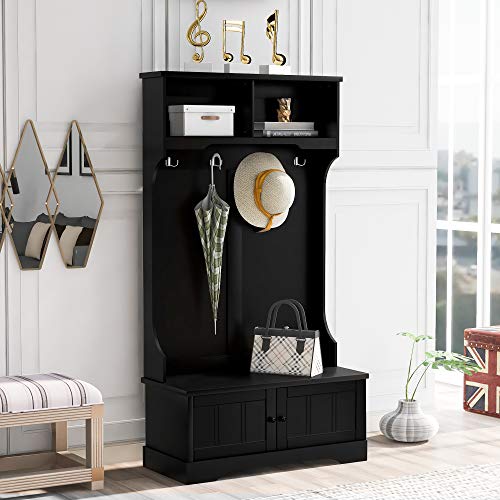
Knocbel Entryway Coat Garment Rack Storage Bench, 3-in-1 Hall Tree with Compartments & 4 Hooks, 40" L x 18.5" W x 72" H (Black)
If you are decorating your home with black paint finished furniture that this piece might be the way to go.

Homissue Vintage Corner Hall Tree with Shoe Bench, Entryway Coat Rack with 6 Double Hooks, Retro Brown
Truth is, not everyone is going to have an entryway that is shaped the same. It may in fact be better for you to have a piece like this in the corner of a room close to the hallway.
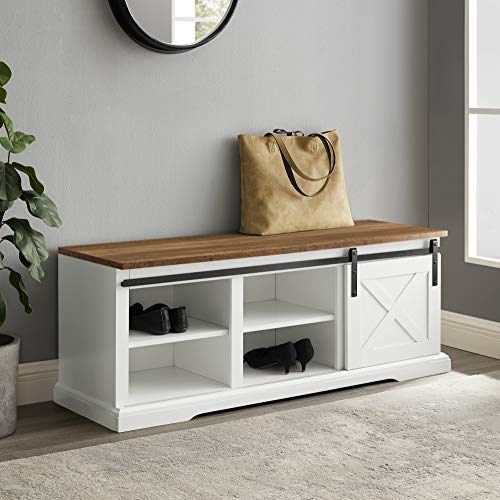
Walker Edison Abbey Modern Farmhouse Sliding X Barn Door Entry Bench with Metal Accents, 48 Inch, White
If you don't want something so tall, you can go with a classic bench form of shoe storage but you won't be able to hang bags, coats, shoes or hats.
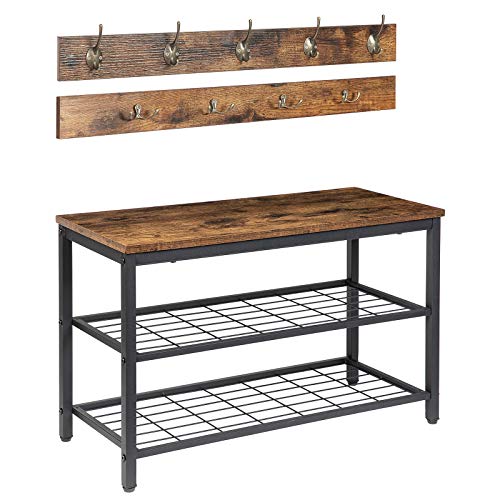
HOOBRO Coat Rack Shoe Bench Set, Entryway Shoe Rack with Coat Hooks, Coat Hat Bag Hanging Organizer, Industrial Design, Easy Assembly, Rustic Brown and Black BF07MT01
If you want to keep the unit minimal then this concept is nice. You can have a bench with a separate hook system allowing you to put the hooks as high or low on the was as you would like. This has that industrial feel again.
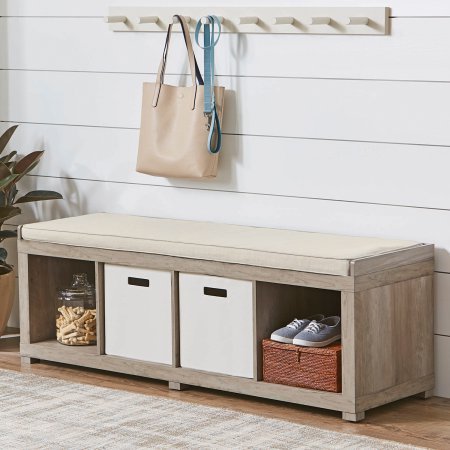
Better Homes and Gardens Cube Organizer Storage Bench - (4-Cube, Rustic Gray) (4-Cube, Rustic Gray)
This is the same concept as the previous one except it has a more elegant look. It's also short enough for kids to be able to easily hang their own hats, scarves, coats and bags.
Step 3. Decide if you need storage bins or baskets based on what items will live in this space.
In one of my past articles I talk about the danger of being a “bin person” because they can lead you to believe you are organized when in fact, you are just hoarding clutter.
In some cases the hallway coat and shoe storage solution that you decide on may have some space for bins. If bins help you keep things together neatly and are needed then go for it.
My hall tree from Amazon didn’t come with bins but I knew I would need them for my kids shoes. I looked at the product details to see the size of the spaces and then looked for baskets that would fit in the space I had.
These are the storage bins I decide on for my hall tree after reading the product size information.

Tip: Be sure that if you plan to use bins that you look at the product details for both the unit or hall tree that you are getting and the size of the bins.
Step 4. Decide on whose putting it together
At first glance this may seem like a silly question but for me I usually don’t want to wait around on my husband to do it for me so I need to make sure it’s something I can manage myself. How do I know? Usually if you read product reviews, especially if you are reading about it on Amazon, the reviewers will take time to discuss the process of building the unit.
In the case of the Vintage Hall Tree with Hanging Hooks that I ordered from Amazon, there were plenty of reviews. All I needed to build it was a phillips head screwdriver for attaching the hooks and it came with the hex tool (which most do-it-yourself out-of-the-box pieces of furniture have this).
Note that depending on where you decide to purchase your own unit or storage solution it may already be intact. For example if you pick your piece up from a consignment store, thrift store, or furniture store.
The other option that you have is to pay for someone to put it together for you. Amazon has assembly services that you can add on at checkout as does websites like WayFair.
Step 5. Clean out the coat and shoe storage area.
Now that you have your hallway coat and shoe solution purchased/ordered, it’s time to clean out the area of the house that the item will be located in. Go ahead and remove any stuff in the way and sweep, vacuum or dust the area to prep it.
Step 6. Gather your tools
When you are ready to assemble the unit if you have to assemble it, you’ll want to gather some basics like scissors, screwdrivers or power screwdrivers so you can put the thing together.
Step 7. Decide where to build it based on how big/heavy it is.
In my case, I stared putting my Hall Tree together in my living room. As I got to the taller parts, I moved it into the hall so that I wouldn’t have to lift it or move it as it got more top-heavy.
Depending on the size and shape you may want to build your coat and shoe storage unit close to the spot it will live in.
Here’s the 3 Minute Recap Video of My Build:
Step 8. Grab some help when you need it.
Don’t be afraid to grab some help as you put your item together. I had my daughter and son hold the pieces in place or support different parts as a I went so I could install all the parts without worrying about putting strain on a part that wasn’t supported yet.
Step 9. Read through the directions at least once before you start.
It’s always as good idea to at least skim the directions and any pop out warnings. That way you are aware as you go of the steps and things you may need to remember or pay attention to as you built.
In my own process I ended up installing one of the hook boards upside down and there may or may not have been a few choice words muttered under my breath.
Note: Often when you are putting things of this size together, the directions will mention not tightening all the screws all the way as you build. That’s because you may literally need a little bit of “wiggle” room as the piece comes together. So they should be secure but not tightened down all the way.
Step 10. Put everything on your new hallway coat and shoe storage solution!
Once you’ve got it finished, add your baskets or accessories. Make sure that if your unit comes with wall attachment safety straps that you follow the instructions for installation. It can help keep your unit from falling over one top of you, a pet or a kid.

Kim Anderson is the organized chaos loving author behind the Thrifty Little Mom Blog. She helps other people who thrive in organized chaos to stress less, remember more and feel in control of their time, money, and home. Kim is the author of: Live, Save, Spend, Repeat: The Life You Want with the Money You Have. She’s been featured on Time.com, Money.com, Good Housekeeping, Women’s Day, and more!