
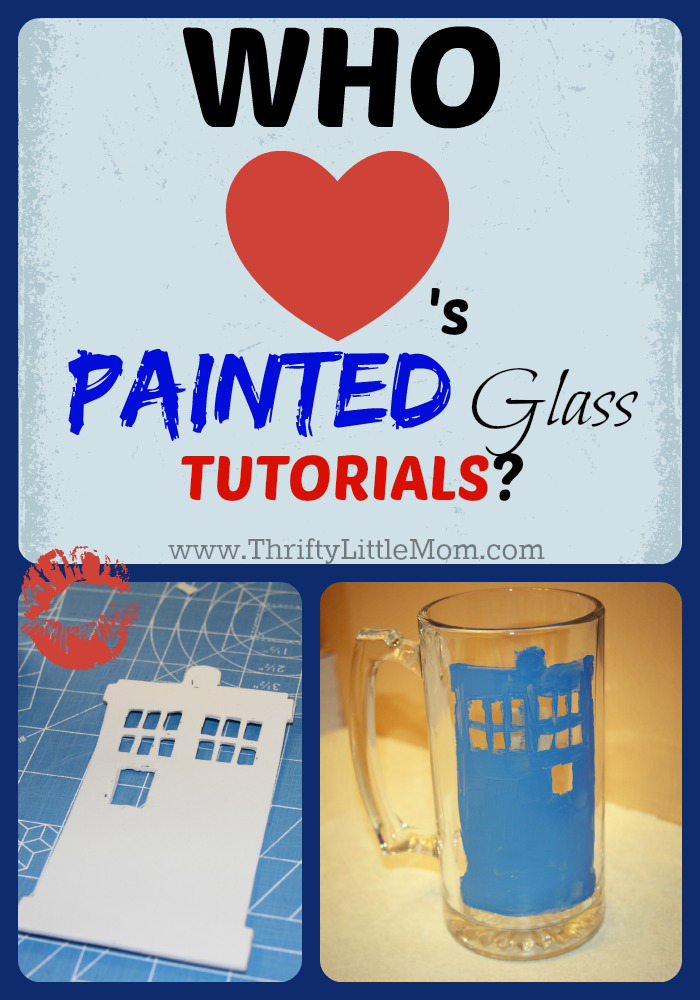
How To Make Personalized Usable Glass Gifts
On my recent journey to my local dollar store I found some amazing large, heavy duty handled glasses. My husband likes these because you can run water over them and then stick them in the freezer and get the glass all frosty and then pour yourself a nice cold Coke.
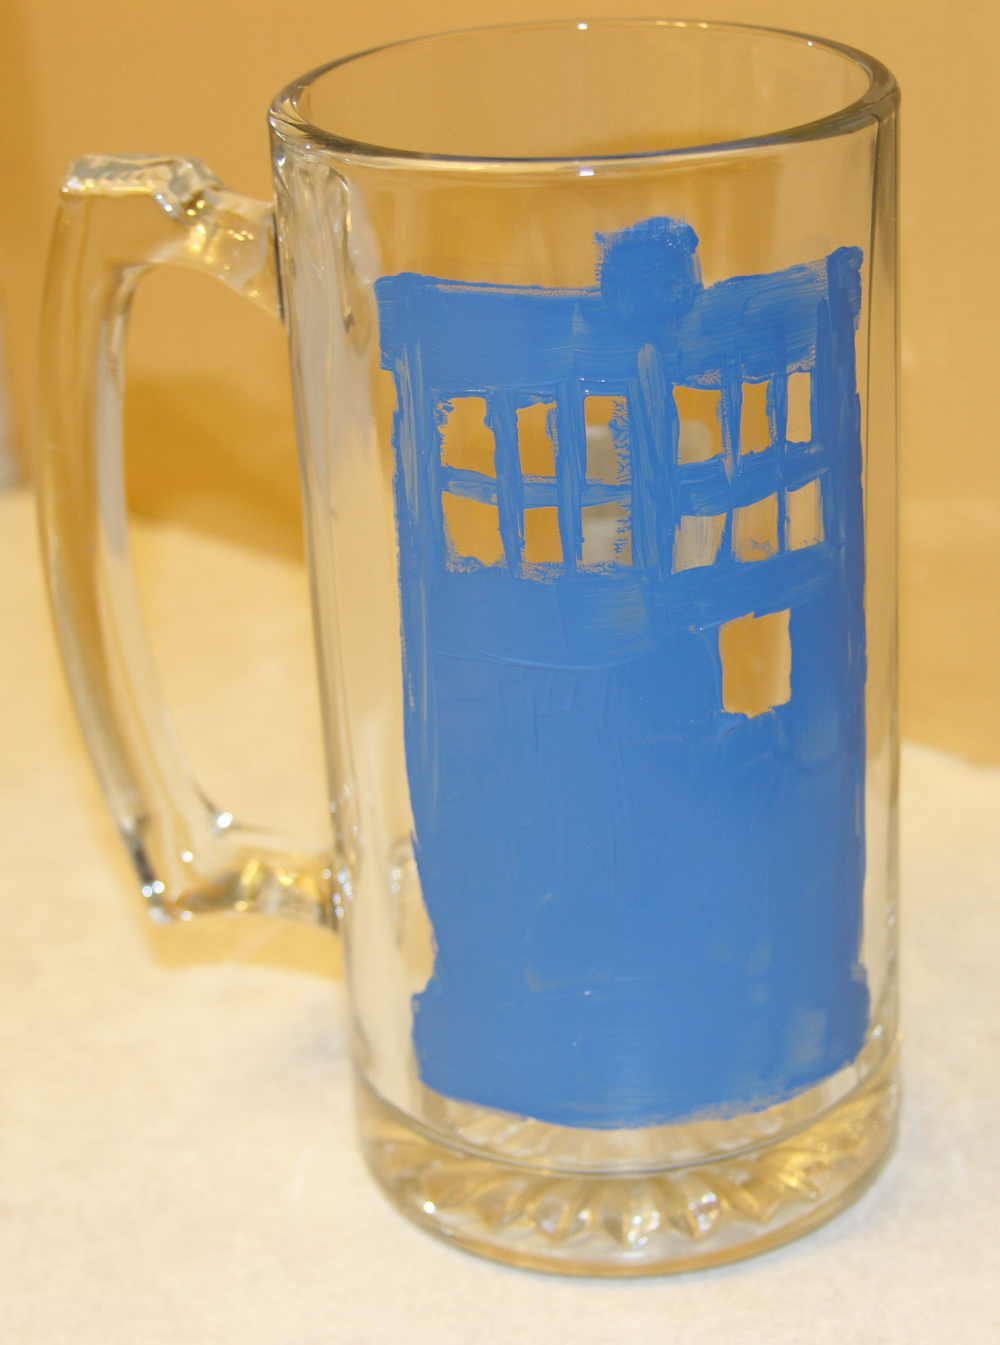
When I saw these I thought they would be great for my brother-in-law as a Christmas gift since he recently bought his first home. But, he’s a pretty unique kind of guy so I thought that I would take these amazing $1 each glasses and turn them into something just for him. That’s when the Doctor Who Tardis came to mind. If you don’t know, don’t ask. It’s better just to use this post to picture a way in which you might make a unique gift for someone you know. It could be a super hero emblem, an owl, or even the letters in their name but whatever it is, you can make this great gift, even better!
So here’s how I did it and you can too!
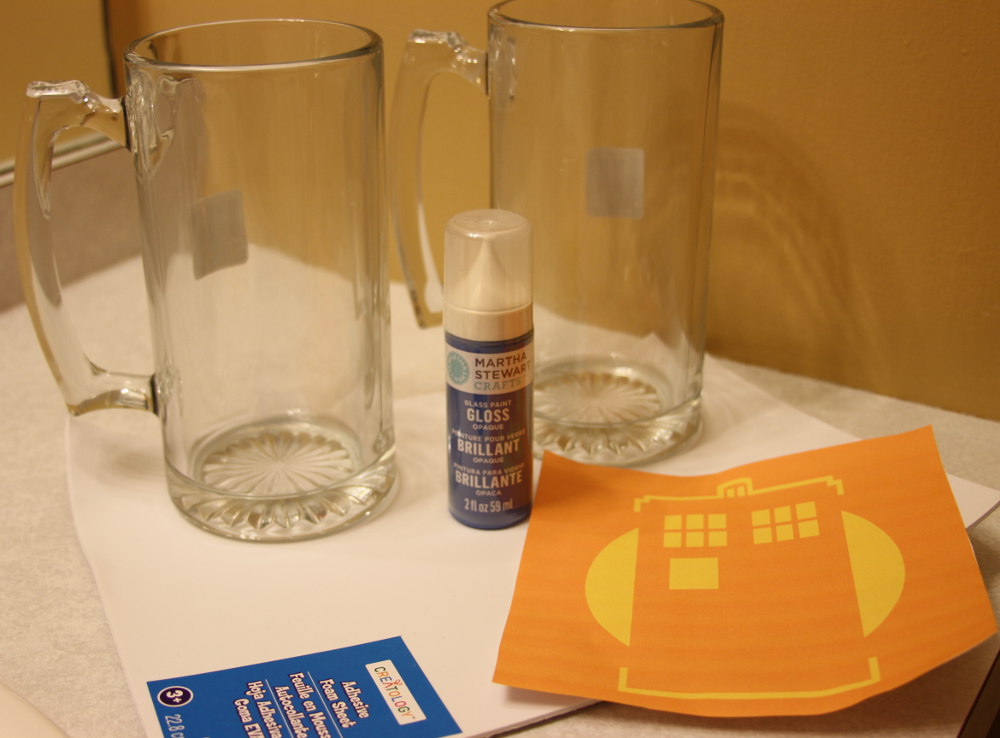
Supplies:
- Glass Item (Handled glasses in my case $1 each!)
- Glass Paint (preferably one that says it it dishwasher safe after curing)
- Craft Foam (I chose the kind with a sticky backside)
- A pattern for what you want to put on the glass.
- Permanent Marker or Pen
- Scissors
- Paint Brush
- Exacto Knife
Step 1: I decided to look for printable Tardis patterns online.
- I found the Tardis pattern I used on http://the-apiphobic-artist.deviantart.com/art/TARDIS-pumpkin-pattern-2-176841646.
- Something that I thought was smart was that I stubbled upon this “pumpkin carving” pattern.
- This made it easier for me to figure out what to cut and what to keep.
- Tip: Consider looking online for a “pumpkin carving” pattern if you are wanting to use a symbol of some sort.
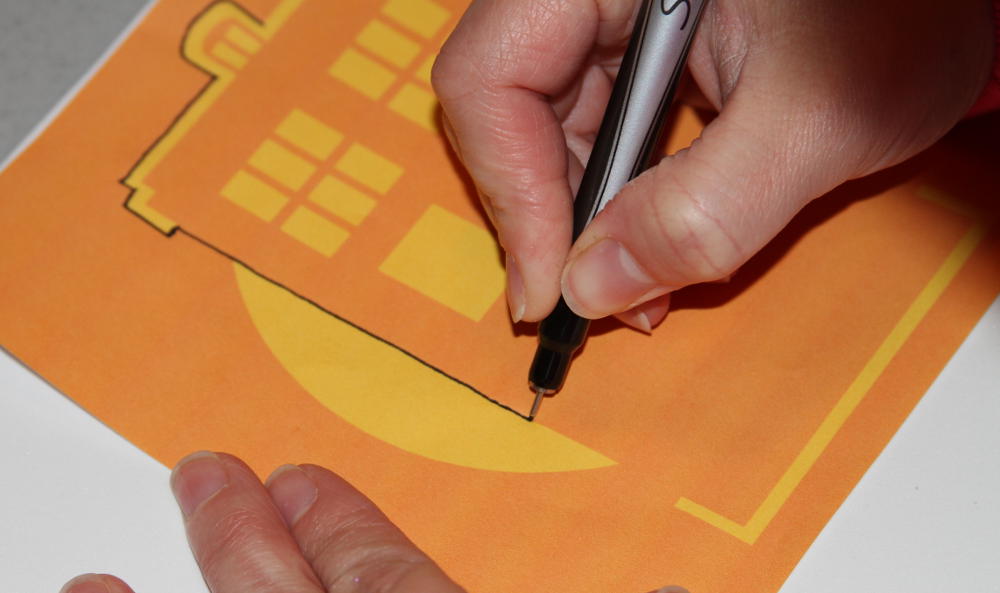
Step 2: Trace & Cut The Design
- Trace your design onto a piece of foam.
- I simply pressed really hard using a sharp permanent pen.
- This didn’t work perfectly so I just got smart and cut the whole tardis out and traced around it with the permanent pin (this step not pictured but the results of my outline job are in the second picture below).
- Once I traced the windows I could still see the impression lines on the foam after removing the picture and used those as my guide for cutting.

- I cut out the shape I wanted by following my lines with an exacto knife. You could use scissors but Exacto knives are well…more exact?


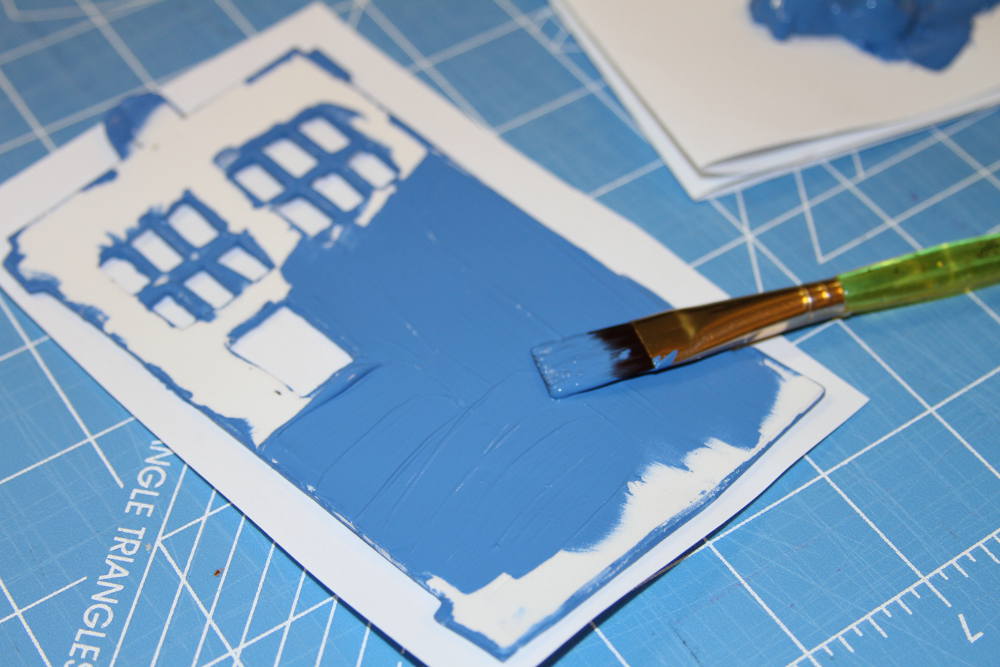
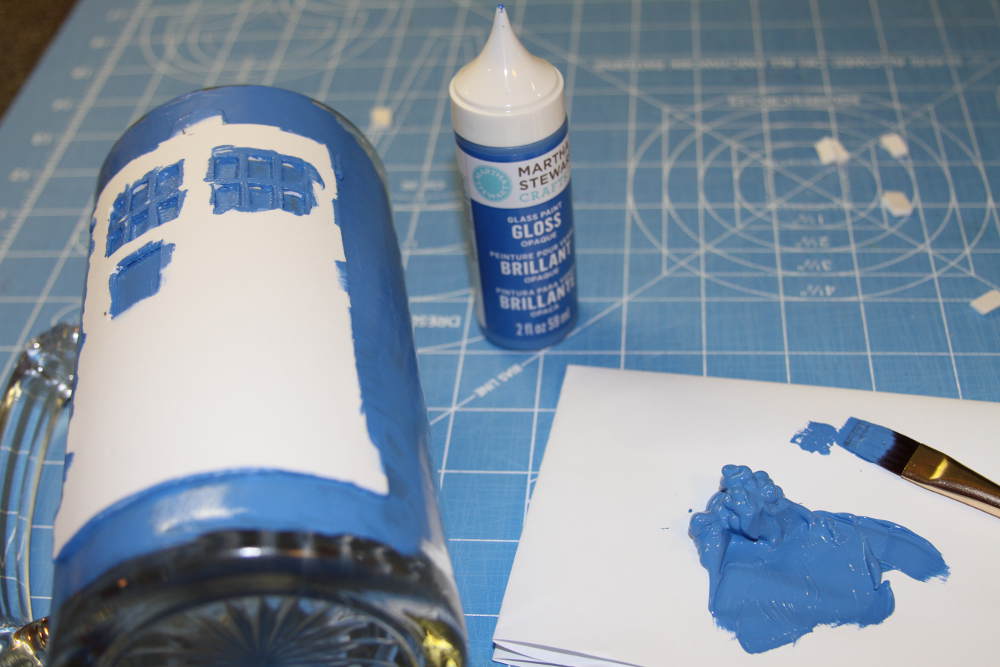
Step 3: Paint
- I followed the instructions on the back of my paint for prepping my glass surface.
- I then experimented with two methods of painting my pattern on the glass.
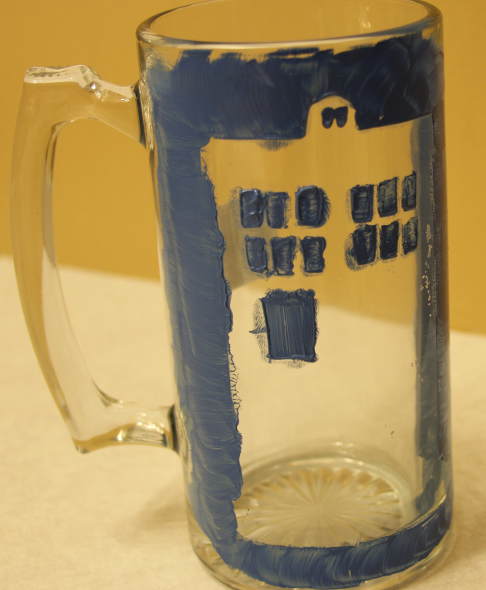
Method 1- Rubber Stamping
- This is where you make your foam a rubber stamp.
- All I did was paint the front side of the foam with my glass paint and then stamped it straight onto the glass surface.
- I followed up using a fine brush to fill in any spots that were missing paint and to overall clean up the appearance.
- Paint Removal Trick: My mom taught me to put a cotton swab stick in my mouth and wet it with my spit and then use the cotten end to clean off any excess paint that gets into spots I don’t want it. Spit does a great job of removing paint. If you have a boo boo or spreading paint, try this method of removal. It gets into tight spots.
Method 2- Stenciling
- I also wanted to see if it would work if I used my foam cut-out like a stencil instead of a stamp.
- This is where the sticky back came in handy because I simply removed the wax paper backing to reveal the sticky side and stuck it straight to the glass. ( Any extra sticky left over after removal comes of easily by rubbing the glass with a little rubbing alcohol.

Remove Foam’s Sticker Backing


- Then I just took my paint and used a paint brush to paint in the window holes and around the outside of my foam shape leaving the outline of the item on glass.
Step 4: Drying
- To complete the project I just followed the instructions on the back of the paint bottle.
- The directions suggest baking these as certain temp in the oven to cure the paint. Since this is glass, I feel comfortable doing that to ensure my brother-in-law can stick these in the top rack of his dishwasher without worrying about destroying the design.
- UPDATE NOTE: My brother in-law forgot my instructions and put the cups on the bottom rack of the dishwasher and the design was annihilated! Sad….
And there is how I did it! Remember you could cut out initials, favorite symbols, favorite things from nature to make glasses unique to the person you are giving them to. It’s really all about making it personalized! Please share any other thoughts or ideas you might have in the comments!
Kim Anderson

Kim Anderson is the organized chaos loving author behind the Thrifty Little Mom Blog. She helps other people who thrive in organized chaos to stress less, remember more and feel in control of their time, money, and home. Kim is the author of: Live, Save, Spend, Repeat: The Life You Want with the Money You Have. She’s been featured on Time.com, Money.com, Good Housekeeping, Women’s Day, and more!