How To Make Bunting for Parties & Kid’s Room Decor
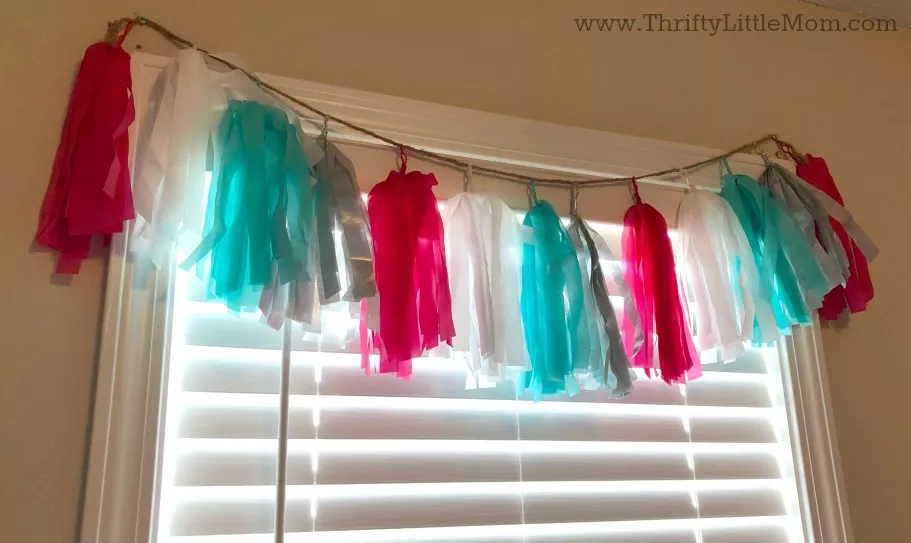
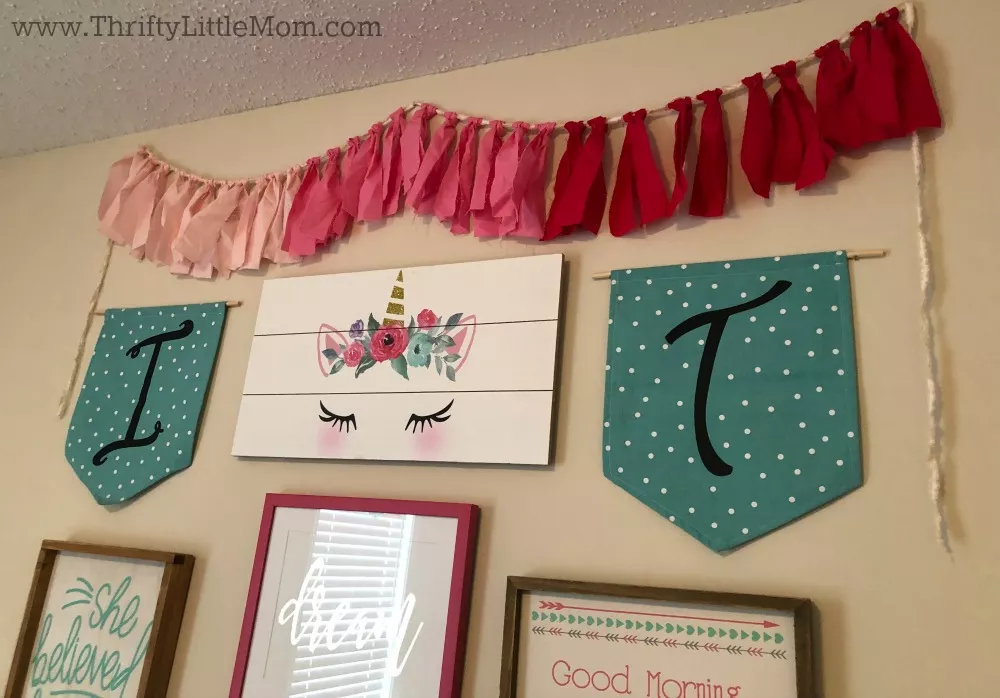
I love to decorate with bunting. They are so cute and fun and they add flair to anything- from a child’s wall, to a holiday or themed party. When I had my baby shower for the twins, my friends made several pom-pom style ones for the party. They looked so good that I ended up using them for room decor later on.
I really like the idea of making these out of fabric or material that will last so that one can re-use them as a sweet memory of a great celebration!
In this tutorial I have images and a video to help you understand how to make bunting.
Bunting is very easy to make and personalize to your own style. Take a look around your house to find locations that need a little extra decoration.
You can use this tutorial to add an extra pop of dimension and create a layered effect with framed pictures and other art. This video will walk you step by step through making your own bunting.
How to Make Bunting Video:
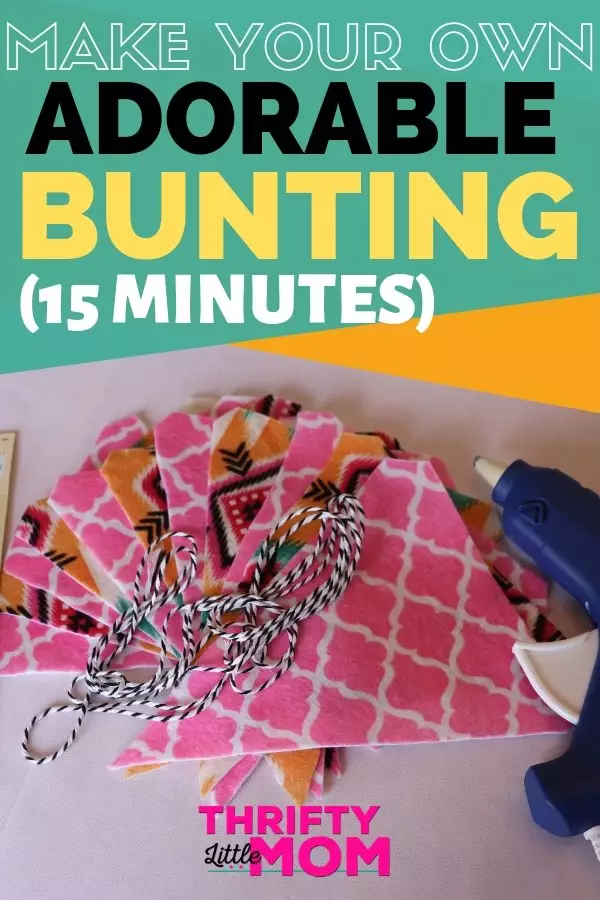
Make Bunting Step #1- Gather your supplies!
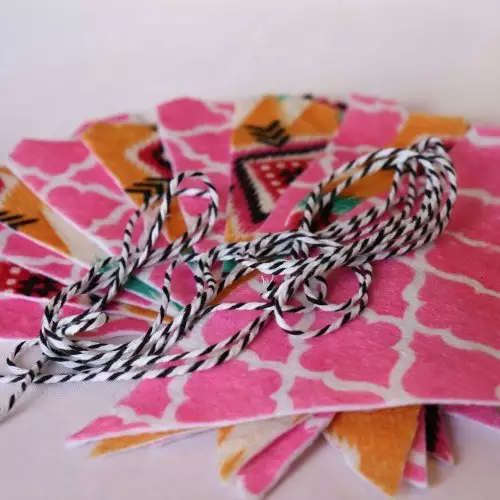
1.Felt squares–
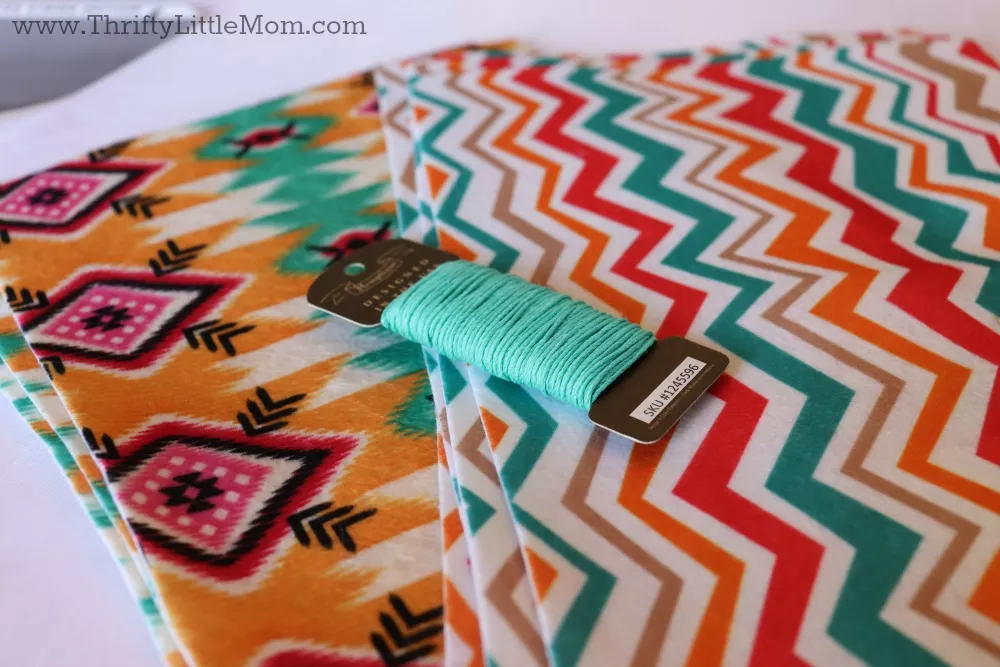
You can get felt at several different retailers. I went to Hobby Lobby, but there are options on online if you don’t find the styles that fit your decor or theme. Pick fun patterns or solids and mix and match them to create visual interest.
NOTE: Watch for stickers on the front side of the felt. The stickiness can mess up the material so look for ones that have the pricing on the back or in an area you wont be utilizing.
I’m a big fan of paper and felt bunting because they don’t require sewing. Felt and paper don’t fray like fabric, unless you are going for a “rag” look. This means that all you have to do is cut them out and you are ready to attach them to string!

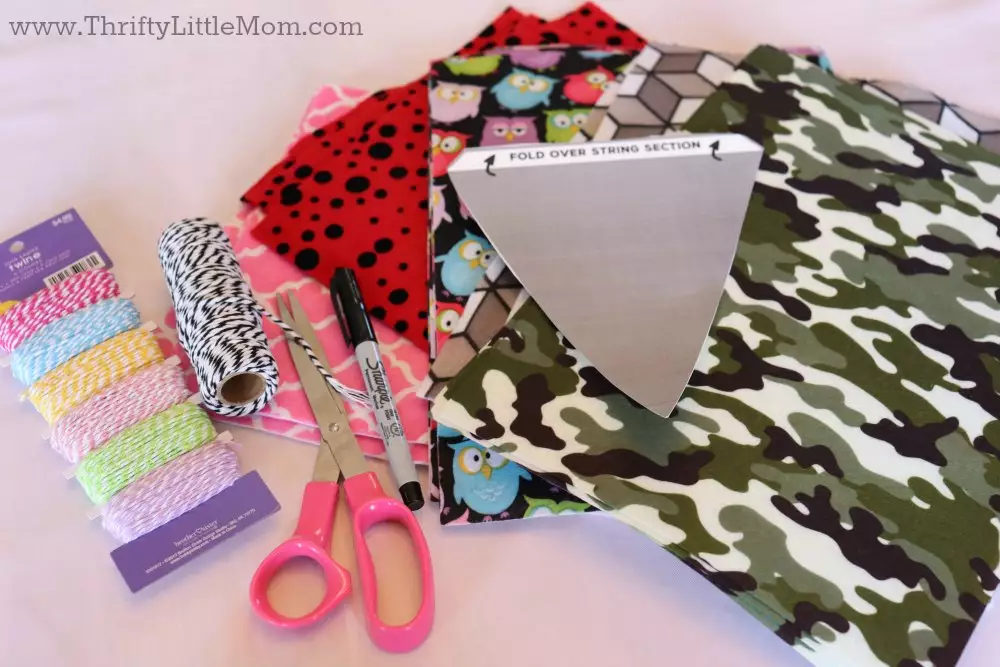
2. Bunting String or ribbon–
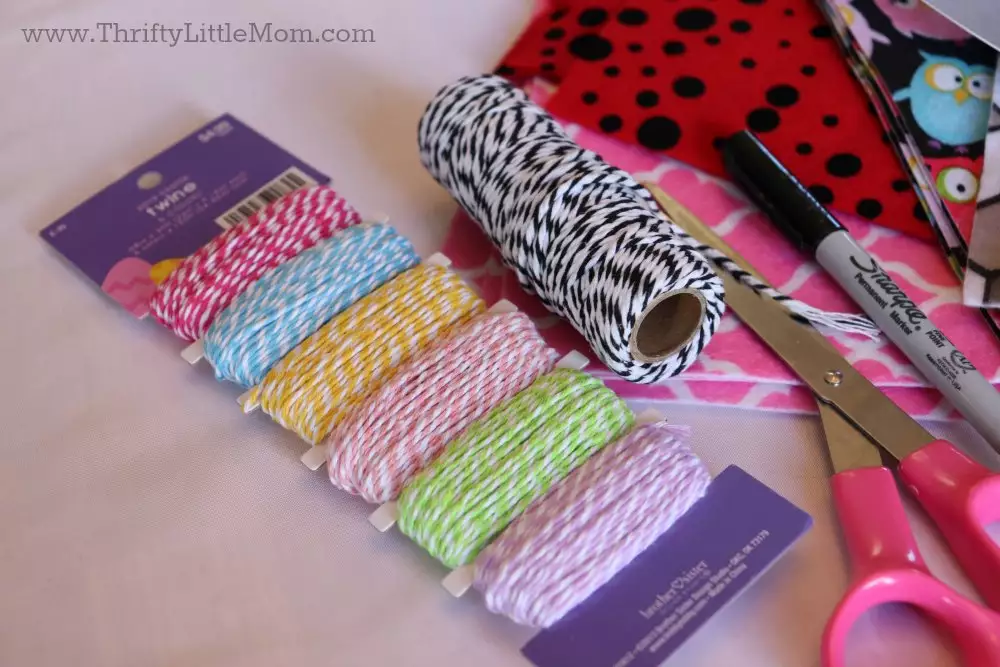
I prefer a decorative string that is thin as it is the easiest to measure for when folding the pattern and glueing. You may find a ribbon that is the appropriate thickness that adds character to the bunting as well.
3. Marker-

You will need something to trace the pattern on the felt. You can use a fine tipped Sharpie (be careful with thicker tipped as it can bleed through the material and cause issues) or chalk. I prefer the fine tipped Sharpie as I like exact lines when cutting.
4. Glue-
I use a hot glue gun. If you are working on this project with children, you may want to consider a fabric glue instead. Fabric glue does take longer to dry than hot glue, but it may be the safer option when little fingers are involved.
Fabric glue is also more heat/moisture sensitive, so consider the temperature/climate this bunting will be residing in.
This project is a little tight when it comes to where you need to fold the fabric over so it’s a good idea to try to prevent a hot glue gun burn if you can!
5. Fabric Scissors- Fabric scissors are imperative. Felt is a thick, coarser fabric and requires a sharp pair of scissors. Don’t panic and use your kid’s safety scissors on this project!
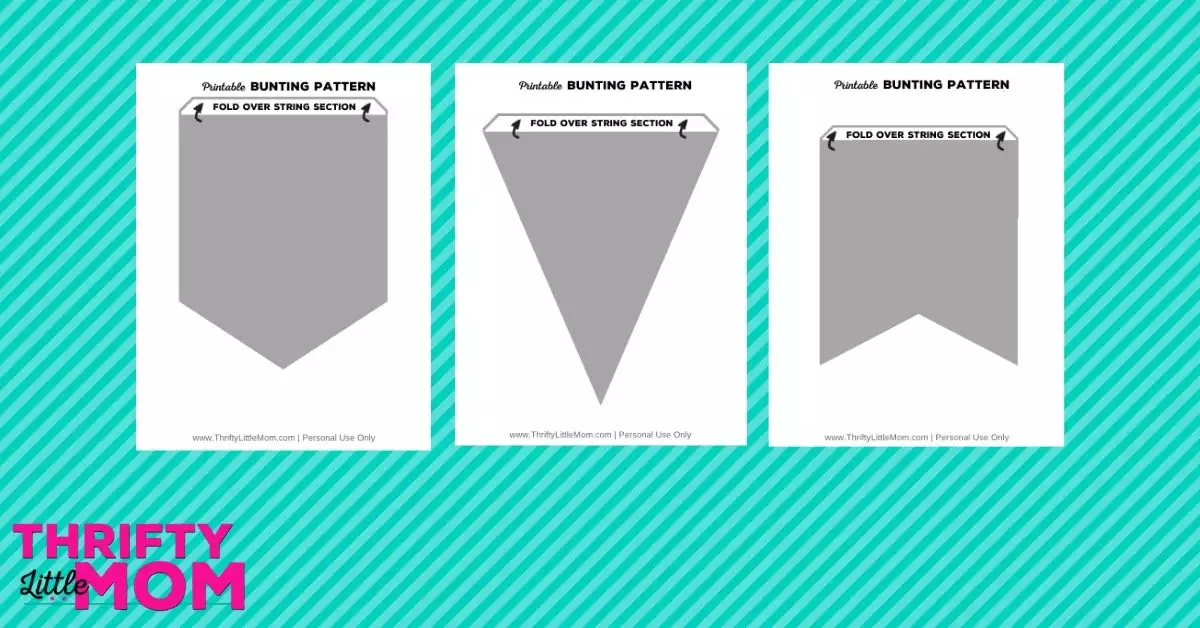
6. Template- I have printable templates available depending on the desired shape. Pick the one that fits your decor and get going!
To see these bunting templates in action read my post: Easy No Sew Bunting Template
Make Bunting Step #2- Step by step guide
- Using card stock paper (the thickness of this paper is important for it to stay in place) print out template and cut out pattern.
- Place card stock pattern onto fabric being sure to fit as many onto the page as possible.
- Trace outline of pattern onto felt being sure to incorporate “fold” tabs. These will be important in the end product not having fabric showing once folded and glued.
- Cut out pattern in the amount of alternating pieces you want. I like to do an odd number so the first and last piece is the same fabric.
- Measure the length of the area you want hang the bunting from (i.e. fireplace, door way, or tablescape).
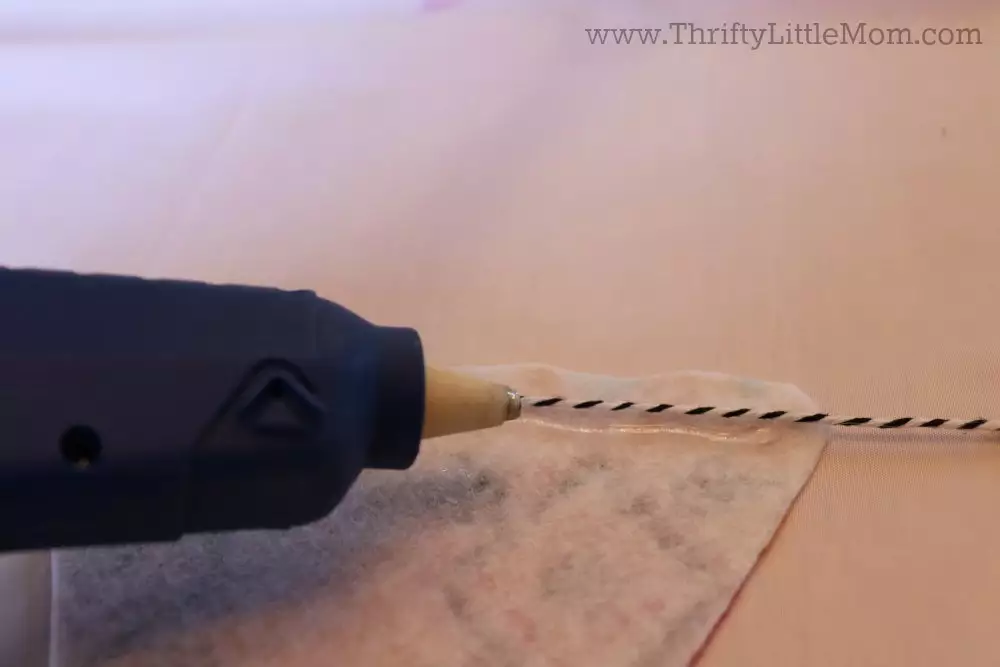
- Fold string in half to get middle point and place first felt piece in this area. Lay the string across the thickest point of felt.
- Spread glue across the string and fold the tab over being careful to line up edges so there is no overlap.
- Continue to place the pendants along the string leaving a gap of 1-2 inches to allow for draping.
Great Bunting Use Ideas:
- baby shower
- gender reveal party
- mantel decor
- kid’s birthday party
- graduation celebration
- Father’s Day
- Mother’s Day
- bridal shower
- bachelorette party
- themed party
- Easter/Spring decoration
- Fourth of July party
- Thanksgiving party
- Christmas celebration
- Valentine’s Day classroom
- St. Patrick’s Day party
- Classroom Decor
- VIP Kids Background
No matter what the event or room decoration desire, this is an easy way to make a big statement. Being that these are so customizable, the possibilities are endless. Also, if you want to, you can add iron on letters to create phrases for your specific needs.
2″ Tall Glitter Letters,Iron On Heat Transfer Vinyl for Custom Name,Birthday Girl Shirt,Boy Shirt,Birthday tees,Bridal Party,Love MOM, DAD, Lets Party,Decoration (Assorted Colors)![]()

![]()
If you are looking for summertime crafting ideas for kids, or a holiday themed classroom craft, this is an easy project for kids as well.
You can utilize the same ideas here and but incorporate thriftier materials such as craft papers, markers, stencils, stickers and glue sticks to let the children make their own. Decorating has never been so easy or adorable!
I I were going to be doing a paper version this, I’d head straight to the scrapbooking aisle of my local craft store as they have ALL kinds of great papers. From glitter, to simple, you can make bunting from festive papers as well! Hope you enjoy this project!

Kim Anderson is the organized chaos loving author behind the Thrifty Little Mom Blog. She helps other people who thrive in organized chaos to stress less, remember more and feel in control of their time, money, and home. Kim is the author of: Live, Save, Spend, Repeat: The Life You Want with the Money You Have. She’s been featured on Time.com, Money.com, Good Housekeeping, Women’s Day, and more!