Thrifty Little Mom

Thrifty parties, celebrations and gatherings!

  • Party Planning
    • Party Themes
    • Party Food & Drink
    • Holiday Party
  • DIY & Crafts
  • Personal Finance
  • Cleaning & Organization
  • About + Privacy Policy
    • Start Here
    • Privacy Policy
  • TLM Shop

Easy DIY Inexpensive Firepit for Backyard Fun

June 28 By Kim Anderson

This post contains affiliate links. If you click & make a purchase, I receive a commission! Thanks! Read my full disclosure policy. As an Amazon Associate I earn from qualifying purchases.
  • Share
  • Tweet

If you’re looking for an easy DIY inexpensive firepit tutorial, then you’ve come to the right place.

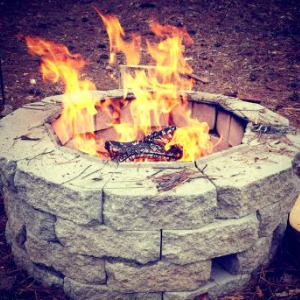
Summer and fall are the best times to be outside, enjoying nature.  One aspect we love most about summer and fall are bonfires.  However, it’s hard to achieve that true bonfire feel in anything but a firepit.  Chimenea’s just don’t get the job done.  

It’s amazing how something like sitting around a fire can bring people together and get them talking.   Add hot dogs, smores, or food cooking in heavy duty tin-foil and you’ve got a party!   

After my husband got way to fire happy and cracked the Chimenea we had, we decided to build a real firepit.

DIY Inexpensive Firepit 1

Fire pit chairs
Here’s how we made our DIY Inexpensive Firepit:

You can read about it below, or watch the video that my husband created that I embedded below:

Step 1.  Contact your Fire Marshal

I called my local Fire Marshal and ask what size “recreational” firepit we were allowed to have in our residential backyard.  (This is not for burning brush piles people- its “recreational”).

Step 2. Gather Your DIY Inexpensive Fire Pit Supplies

  • Head down to your local home improvement or landscape supply store.
  • Go into the garden department.
  • Look at the various retaining wall and/or fire stone options they have.
  • We decided to go with concrete the retaining wall blocks because they were $1.25 each.  
  • We bought about 40 which means it cost us around $50 to build. 
  • They come in many styles and colors so you can get all fancy if you want to. 

Note: If you don’t have any cash but you’ve got a lot of rocks, we also wrote an article about how to build a fire pit with rocks: Build Your Own Backyard Fire pit Using Free Materials.

Step 3. Prep Your DIY Fire pit Area 

  • No mortar is needed.  It’s all about stacking them correctly.
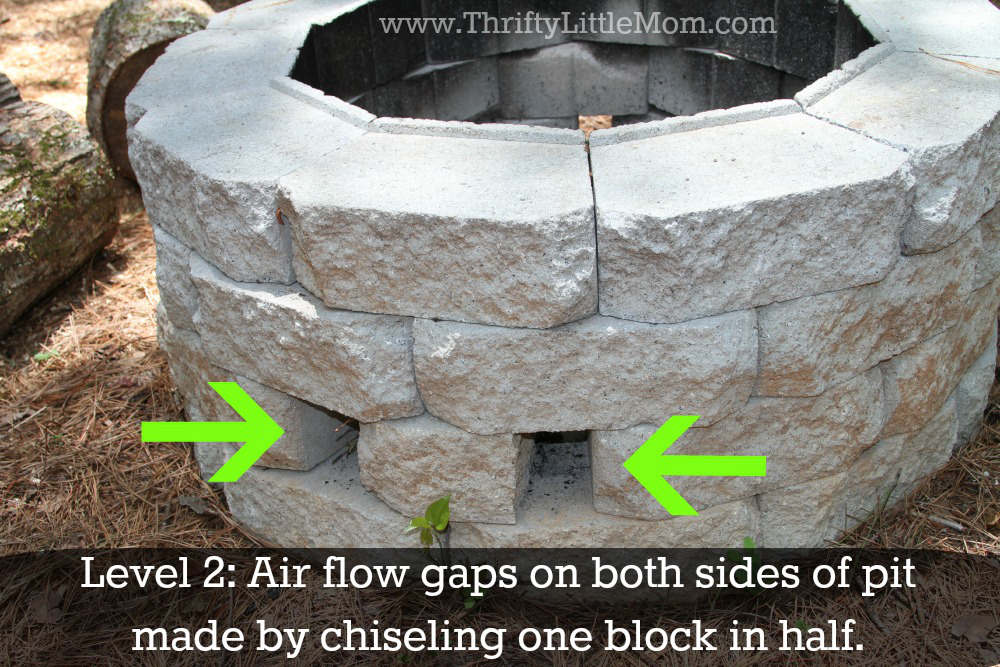
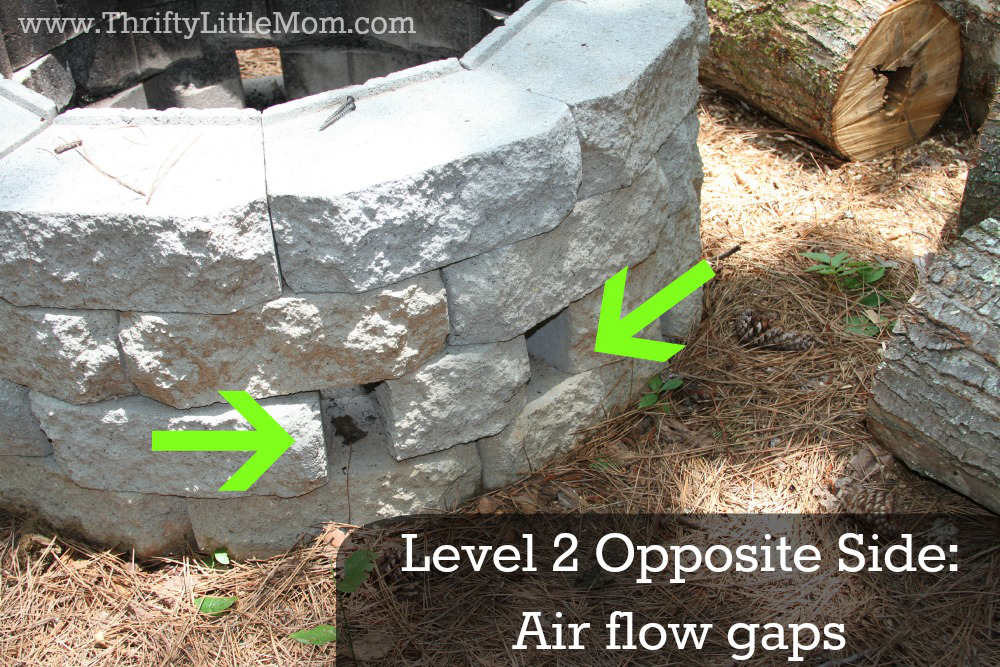
  • We broke one block in half using chisel and hammer on purpose.  (This is for level 2 of the pit so that air can reach the fire and you’ll see this noted in the instructions below.).
  • We picked a flat area in the back yard and cleared out the grass/pine straw.

Note that some people like to get fancy here and add pea gravel or other stones to the base of thier firepit and that’s totally up to you.  We kept it simple to keep the cost of building the DIY fire pit to a minimum. 

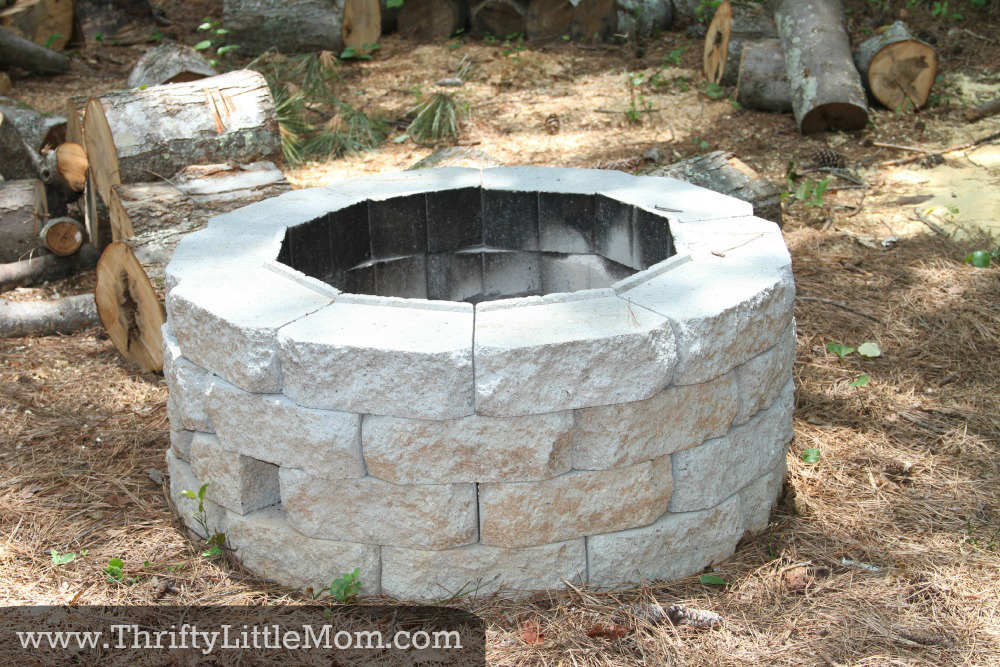
Step 4: Stack the bricks. 

In this step I’m going to show you level by level how we stacked the bricks and what pattern so that you can get a visual for how we did it layer by layer. 

Again, refer to the video if you find these illustrations confusing. 

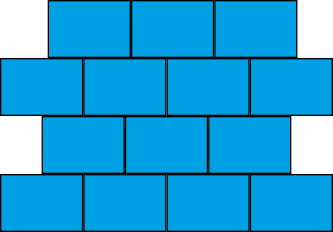
Level 1 DIY Fire Pit-

We began the base by placing 10 “blocks” in a circle on the ground.  They fit together nicely.

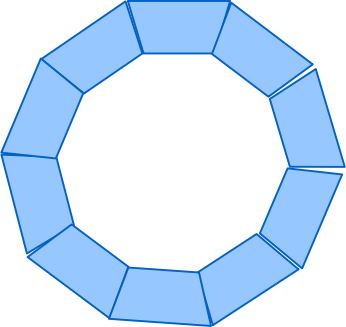
Level 1 Block Formation

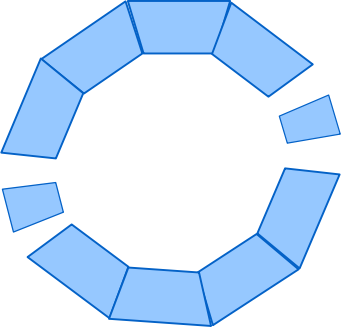
Level 2 DIY Fire Pit-

Then we started level two, placing these blocks so that they were centered on the cracks of the level 1 blocks.  This way the structure is sturdy.  (You don’t want 10 blocks stacked 4 high straight on top of one another because you are just asking for them to fall over.)

 
Each level should be stacked so blocks are centered on crack below it.


Also on level two, we had to place the broken in half blocks midway between two neighboring blocks on opposite sides.  That way air could get into the pit and we don’t have a smoky mess.

 
DIY Inexpensive Firepit 2
DIY Inexpensive Firepit 3

Level 3 DIY Fire Pit –  

Level three was the same as level one.  10 whole blocks stacked centered on the crack of the blocks below.

Level 4 DIY Fire Pit- 

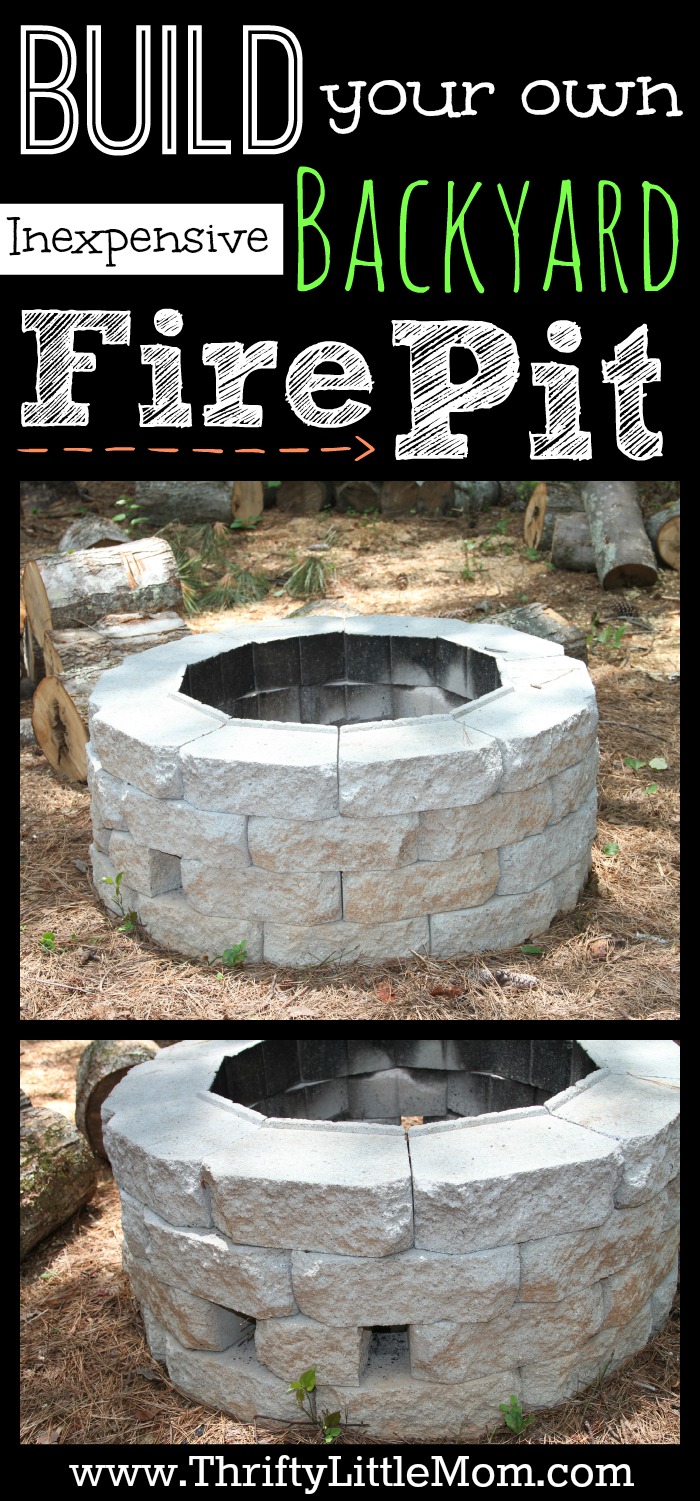
Level four is 10 whole blocks stacked centered on the crack of the blocks below and the lip left on these blocks formed a lip around the inside.  You can see the small ridge on the inside of each top block in the pictures below.  (Note that you may not buy bricks with a lip so you don’t have to worry about it.) That’s it!

What is the size of the diy fire pit opening? 

I’ve had many readers ask about the size of the opening when the project is complete and it is just around 2ft in diameter.

DIY Inexpensive Firepit 4

Step 5: Clean Up the Fire Pit Area

Once you’ve got everything for your DIY inexpenisive fire pit arranged the way that you want it you can now clean up any of your tools and left over supplies.  

Consider clearing, raking or flattening the area that you plan to place your firepit chairs.  

Find a good place to stack your firepit wood nearby. 

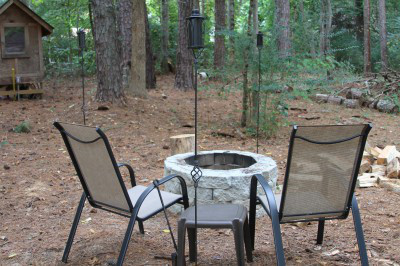
Step 6: Set Up the Fire Pit Entertainment Area

What I love most about having this backyard fire pit is that in the spring, summer and fall it serves as a great place to hang out with friends and family.  

The 2 Main Acccessories that every DIY fire pit area needs are:

  • Comfortable chairs
  • Side Tables or Drink Holders

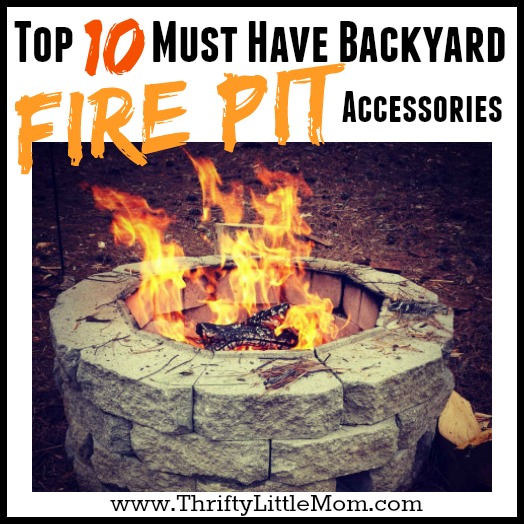
If you plan to do a lot of entertaining and want to keep your people comfortable, check out my article on 10 Must Have Backyard Fire Pit Accessories.

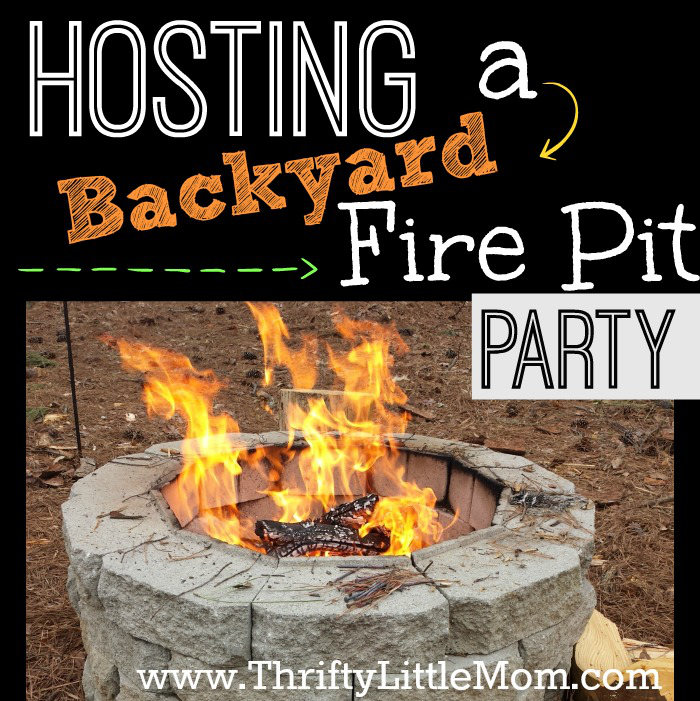
Step 7: Plan Your First Fire Pit Gathering

Now that you have the area all set up and you’ve got your accessories squared away you can invite people over for a backyard firepit party. 

Having everyone gather around with a good beer and or things to cook can be a ton of fun.  This article on 6 Foods to Cook on a Stick   is fun.

Important DIY Fire Pit Safety Notes: 

Please note that  we are not firepit professionals, if you copy this design and use the fire pit, you do so at your own risk.  This was made for simple recreational use.  

Always be careful with animals and small children around firepits.  The sides of the pit are NOT made to be sat upon.  

The fire should not be raging above the blocks at the top of the pit.  

For more tips on how to build a safe fire as well as put one out, check out this article on 5 Precautions to Keep Your Fire Safe. 

I hope you found this tutorial on how we made an easy DIY inexpensive firepit ourselves with only $60 helpful as you tackle your own project. 

I’ve loved seeing readers finished firepits on Instagram so if you build it, consider givng me tag @thriftylilmom so I can check out what you made! 

6 Ways to Create A Thrifty Outdoor Oasis

Build Your Own Backyard Fire Pit Using Free Materials

Top 10 Must Have Backyard Fire Pit Accessories

Tips for Hosting a Backyard Fire Pit Party!

Kim Anderson

Kim’s is the party planning, thrifty life-loving, intentional living catalyst behind the Thrifty Little Mom Blog. Kim was a pro event planner for over 7 years before she became a full-time blogger. Kim is the author of: Live, Save, Spend, Repeat: The Life You Want with the Money You Have. She’s been featured on Time.com, Money.com, Good Housekeeping, Women’s Day, and more! Kim aims to inspire you to create, celebrate, and live life intentionally!

Summary
Easy DIY Inexpensive Fire pit for Backyard Fun
Article Name
Easy DIY Inexpensive Fire pit for Backyard Fun
Description
This fire pit can be build for around $60. Step by step instructions plus a video on how to build these quick and easy fire pits!
Author
Kim Anderson
Publisher Name
Thrifty Little Mom
Publisher Logo
Thrifty Little Mom

Filed Under: DIY & Crafts, DIY Home Improvement Projects

« Travelin’ Man: Packing List for Business Trips
Cleaning Your Home: No Gas Mask Needed »

Comments

  1. Melissa says

    May 12 at 11:09 am

    Was it hard to chisel two bricks in half and Im also wondering if it was hard to chisel the lips off of most of the bricks? Can you buy bricks without the lips to skip this step? Thanks!!

    • Kim Anderson says

      May 13 at 9:30 am

      Melissa, yes you can just buy bricks without lips. My husband chose those because they were cheaper and he had that little hammer and chisel to get it done. Just look around at your local home improvement store in the retaining wall/bricks area and find ones with that Trapezoid shape without the lip. Good luck!!

  2. Amy says

    May 20 at 9:58 am

    Excellent article, thanks! Can you update the link to the retaining wall blocks you used (or give me the approximate size)? I’m absolutely going to do this!

    • Kim Anderson says

      May 20 at 2:22 pm

      Amy, thanks for letting me know about the link issue. I updated it. 12 in. L x 4 in. H x 7 in. should be the size we used. Hope you enjoy building yours and using it as much as we do!

    • Debbie says

      October 21 at 7:36 am

      Excellent instructions on the fire pit, I am alone so I just got one of those fire bowls at HD last year, but all your suggestions about the smores are spot on I am going to a “bon fire” this weekend and am gong to ask the hostess if I can bring some of the smores kits. thank you

      • Kim Anderson says

        October 21 at 8:49 pm

        Debbie that’s awesome!! I hope your smore kits are big hit!

  3. Jason Styles says

    April 9 at 10:07 pm

    Did you use an adhesive bond the bricks? Also do you have a grate in your pit. Or, you use firwood that you just place in there.

    • Kim Anderson says

      April 9 at 11:45 pm

      No adhesive was used. We just stacked them as shown. If it makes you more comfortable you could try that with your pit. We don’t have a grate but lots of people have asked about doing it so I shared the diameter. We just use firewood from trees we had taken down in our yard and place it right into the pit. We usually cook in tin foil pockets or on roasting sticks. Hope that helps!

  4. cole bernath says

    March 7 at 8:57 pm

    That’s perfect because I’m trying to look for an inexpesive easy firepit for my backyard

    • Kim Anderson says

      March 7 at 9:37 pm

      Thanks for the comment! Hope you find it easy to put together!

  5. Chris says

    February 19 at 2:43 pm

    Ha, Simple and great idea!

  6. Tina says

    January 22 at 8:09 pm

    Thank u so much for your help i have started it got the bricks put just had surgery for my cancer i had but i want this to sit and relax by and u helped alot by telling me how to build it u r so wonderful for giving me the help i need to get started thanks alot

    • Kim Anderson says

      January 22 at 9:54 pm

      Tina, I’m glad you found the tutorial helpful. Be super careful and maybe get some burly men to build it for you in exchange for pizza and lemonade. Hope you love it!

  7. Bonnie says

    October 26 at 10:20 am

    Love this. Trying to figure out how to use beach rocks since we have a shoreline full of them…that probably would be more expensive in the long run than the one you made. If you have any comment on this it would be greatly appreciated. Thanks

    • Kim Anderson says

      October 26 at 4:29 pm

      Bonnie, If you have a way of moving them and they are on your property, I think it would be pretty inexpensive.

  8. Karen Anderson says

    October 22 at 6:41 pm

    Thanks for the tutorial. My husband’s birthday is coming up and I have wanted to do this. He loves to spend time outside with a fire and his bloodhounds. We have a sad crumbling little store bought pit that is about 5 yrs old. This will be an amazing gift!! I can’t wait to invite friends over 😉

    • Kim Anderson says

      October 22 at 11:04 pm

      Karen! He will love this! My husband spends so many hours outside enjoying the pit. It is a very frugal gift that keeps on giving!

  9. Sara says

    September 14 at 4:58 pm

    This is awesome! I’ve always wanted a fire pit, but we don’t really have a place for it. I know it would be well used too!

    • Kim Anderson says

      September 14 at 8:14 pm

      If you don’t have a lot of space a chiminea might be a better backyard option for you.

  10. Derek Young says

    August 14 at 2:42 pm

    Have you had any problems with the stones starting to crack? I was thinking of doing this same time of pattern but was warned about that so I didn’t go any further.

    • Kim Anderson says

      August 14 at 4:32 pm

      That’s a good questions Derek. When I saw your question I ran out to inspect the pit so I could give you an accurate answer as we have had it for over a year now and I have never noticed this as a problem. My husband has used this many, many hours in the last year and upon inspection it appears that several of the stones have a single hairline crack that runs from the dead center of the stone on the inside of the pit edge to 1/3 or 1/2 way in the middle. None of them are all the way through or appear to be compromising the stability of pit. If that changes in the future though I’ll be sure to note that in the post and let people know. There may be stones in the garden center that don’t have that potential weak point in the middle like the stones we used that form at angles. We also built one out of creek bed rocks at our families house in the mountains and that one is doing just fine. Our chiminea literally cracked right down the back which was really kind of scary. At least with these stones if you have issues, it’s only a few bucks to switch out the stone as opposed to having to ditch the entire thing like we had to do with our chiminea and those things are like $80 each. It probably also depends on how much you use it. We have a ton of wood and my husband likes being outside so it gets used on average 3 times a week for us. If you are building if for weekends or recreational use, I don’t know that you would get those cracks for sometime but again, I’m no landscaper or fire pit architect. I’m just showing people how we made ours and we still like the design. Thanks again for the comment.

    • Kim Anderson says

      August 21 at 10:53 pm

      UPDATE since what I wrote above. A tree fell on the firepit over the weekend during a storm and only one stack of blocks that took the biggest hit cracked straight down the center. Now I have to go buy 4 new bricks at $1.50 to replace them and it should be good as new.

  11. Chad Pfeffer says

    August 12 at 1:42 pm

    This is the best fire pit tutorial I have seen on the web yet. The air holes are often overlooked! And this is so economical! Nice!

    • Kim Anderson says

      August 12 at 2:22 pm

      Thanks for the comment! My engineer husband designed it and he thinks about stuff like air holes. lol Glad you found the tutorial helpful.

      • Tom Hawkins says

        September 22 at 5:18 pm

        You are very modest giving your husband the credit for the air holes. God would be Proud. I agree with the others that this is a very nicely done illustration of an inexpensive fire pit.

        Just one question: Is there any issue or concern since the firepit is sitting on brown dead grass or straw or whatever, that the fire would spread to the grass when using the firepit? Thanks, God Bless, and have a great week

  12. Lisa says

    May 20 at 11:34 am

    Looks like the perfect place to spend a relaxing evening! I’ve wondered how hard it would be to build a fire pit. You’ve made it sound reasonably easy. Pinned for future reference. Thanks for the tutorial!

    • Kim Anderson says

      May 20 at 1:47 pm

      Lisa, glad you liked the post and are considering building one. They are really great for entertaining or getting out of the house in the evenings.

  13. Charlene says

    May 17 at 8:56 am

    What a great tutorial. So glad I read because I would not have thought about the air vents on level 2. Thank u!

    • Kim Anderson says

      May 17 at 3:51 pm

      I think that was my husband’s engineering brain at work because I would not have thought about that either. Thanks for taking the time to comment!

  14. Melinda says

    May 6 at 3:20 am

    Did you put anything on the ground inside ?like rocks or sand

    • Kim Anderson says

      May 6 at 11:55 am

      Melinda, you could if you wanted to but our backyard is mostly pin needles and dirt in the area we built ours. You may want to just clear out the grass and get the area inside down to dirt. We literally just threw the wood in and started burning. We are also kind of “thrifty” about stuff so that was just more cost that we didn’t find necessary with the condition of our yard. It’s really natural back there. 🙂

  15. David says

    April 14 at 6:12 pm

    Any chance you could give me the diameter of the opening at the top of this in so I can price a grate that would fit? Thanks for the great instructions!

    • Kim Anderson says

      April 14 at 7:13 pm

      David, the opening is just a little over 2 ft. Hope that helps!

  16. Kris brizuela says

    March 15 at 12:24 pm

    This is what a a detailed pin is supposed to be! Amazing and what an AWSOME job!

    • Kim Anderson says

      March 15 at 3:25 pm

      Hey thanks! Hope you can build one yourself!

      • Anonymous says

        August 14 at 1:39 am

        I plan on doing this great project. Were did you purchase your blocks?

        • Kim Anderson says

          August 14 at 4:53 pm

          Home Depot

Trackbacks

  1. Thrifty Summer Cookout Tips- TLM Podcast Episode 027 » Thrifty Little Mom says:
    July 20 at 10:35 am

    […] Your Own Fire pit- Here are the Instructions on how to build your own Backyard Fire pit!  This post includes step by step image instructions as well as video that my husband […]

  2. Top 10 Must Have Backyard Fire Pit Accessories » Thrifty Little Mom says:
    July 5 at 7:00 am

    […] home improvement store.  Here’s my husband’s “how to” video or visit this link to my blog post with step by step instructions.  This has been perfect for our own uses as well as large enough to get a crowd around for some […]

  3. A Place in the Sun, Part 4: Let Your Patio Tell the Story of Your Summer says:
    April 26 at 10:27 am

    […] in general, people tend to gather, and your back yard needs a centerpiece.  A simple, DIY fire pit can be built within hours, and for only about $50.  Always practice safety – let the […]

  4. Heat up your outdoor decor | Clemson, Seneca, Lake Keowee, Lake Hartwell and Surrounding Area Real Estate :: Les Walden Real Estate says:
    March 10 at 3:18 pm

    […] This one cost around $50 to make, and the post has some good tips on air flow to make sure you don’t get smoked out. […]

  5. DIY – Redecorate Your Backyard on A Budget | Synergistic Mind says:
    February 22 at 1:16 pm

    […] best thing is that you can build your own fire pit using only stone pavers, bricks, gravel, cinder blocks or some other non flammable […]

  6. Build Your Own Backyard Fire Pit Using Free Materials » Thrifty Little Mom says:
    February 17 at 10:43 pm

    […] Easy DIY Inexpensive Firepit for Backyard Fun […]

  7. 35+ DIY Fire Pit Tutorials: Stay Warm And Cozy | Architecture & Design says:
    November 17 at 6:45 pm

    […] Project Source and Tutorial – thriftylittlemom […]

  8. 50 Awesome DIY Fire Pit Design Ideas | List Inspired says:
    November 8 at 11:41 pm

    […] Inexpensive Firepit for Backyard Fun: A simple DIY inexpensive firepit tutorial with pictures & diagrams. It costs about $60 to […]

  9. Winter DIY: Awesome Fire Pit Ideas That Will Warm You Up says:
    October 10 at 1:30 pm

    […] Tutorial via thriftylittlemom […]

  10. 6 Ways to Create A Thrifty Outdoor Oasis » says:
    August 6 at 11:54 am

    […] to build a super simple backyard fire pit.  It cost us right around $60 to build.  Check out my Easy Inexpensive DIY Backyard Fire pit tutorial for supplies, step by step instructions and diagrams.  If you want a more natural fire […]

  11. Stay Warm And Cozy With These 35+ DIY Fire Pit Tutorials – Cute DIY Projects says:
    May 22 at 8:10 am

    […] Project Source and Tutorial – thriftylittlemom […]

  12. 20+ DIY Fire Pit Ideas - DIY Crafty Projects says:
    May 18 at 9:37 pm

    […] Easy DIY Inexpensive Firepit for Backyard Fun […]

  13. 20 DIY Projects for the Home - The Realistic Mama says:
    February 9 at 9:15 am

    […] Gear up for summer parties by making this DIY Fire Pit in your backyard. This mom says she only spent $50 on this […]

  14. Fire to the Pit | SundaySchauers says:
    January 22 at 9:06 pm

    […] would be too easy.  Simple is also a plus, which is why we based our pit off of this tutorial by Thrifty Little […]

  15. 5 Cheap and Creative Winter DIY Projects for Your Home | LCI Mag says:
    November 25 at 2:06 pm

    […] this backyard fire pit using concrete retaining wall blocks. The flared design works perfectly for creating a circle shape. However, don’t limit yourself […]

  16. DIY Fire Pit – Backyard Ideas – ALL YOU | Deals, coupons, savings, sweepstakes and more… says:
    September 2 at 2:31 pm

    […] With these easy to follow instructions and bricks starting at $1.25, you’ll be inviting all your friends over to enjoy this fire pit from Thrifty Little Mom: […]

  17. Building a Super Thrifty Backyard Play Zone says:
    April 9 at 4:01 pm

    […] child so we haven’t had to have a kid-friendly backyard set up.  There are piles of brush, a fire pit and poison ivy.  Having spent one too many days watching my kid run around picking up sticks and […]

  18. “Manly” Party Planning the Thrifty Way | Thrifty Little Mom says:
    January 11 at 8:41 pm

    […] night was filled with strategic board games and a bonfire outback in our fire pit.  The Party […]

Snag My Book

Available at:

Barnes & Noble

Amazon

Thrifty Little Mom is a participant in the Amazon Services LLC Associates Program, an affiliate advertising program designed to provide a means for sites to earn advertising fees by advertising and linking to amazon.com.

Copyright © 2021 Thrifty Little Mom · Web Design by Moritz Fine Designs LLC

This website uses cookies to improve your experience. We'll assume you're ok with this, but you can opt-out if you wish. Cookie settingsACCEPT
Privacy & Cookies Policy

Privacy Overview

This website uses cookies to improve your experience while you navigate through the website. Out of these cookies, the cookies that are categorized as necessary are stored on your browser as they are essential for the working of basic functionalities of the website. We also use third-party cookies that help us analyze and understand how you use this website. These cookies will be stored in your browser only with your consent. You also have the option to opt-out of these cookies. But opting out of some of these cookies may have an effect on your browsing experience.
Necessary
Always Enabled

Necessary cookies are absolutely essential for the website to function properly. This category only includes cookies that ensures basic functionalities and security features of the website. These cookies do not store any personal information.

Non-necessary

Any cookies that may not be particularly necessary for the website to function and is used specifically to collect user personal data via analytics, ads, other embedded contents are termed as non-necessary cookies. It is mandatory to procure user consent prior to running these cookies on your website.

SAVE & ACCEPT