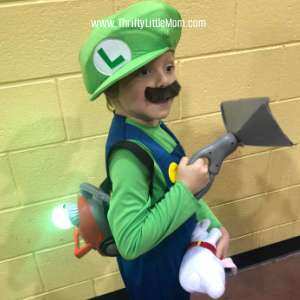
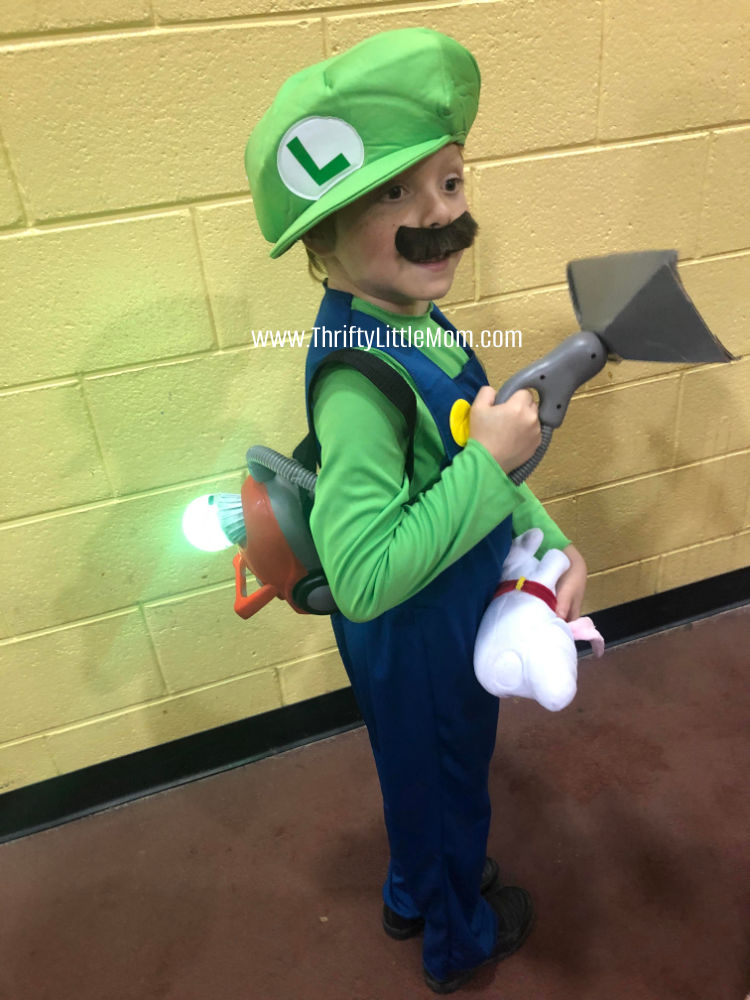
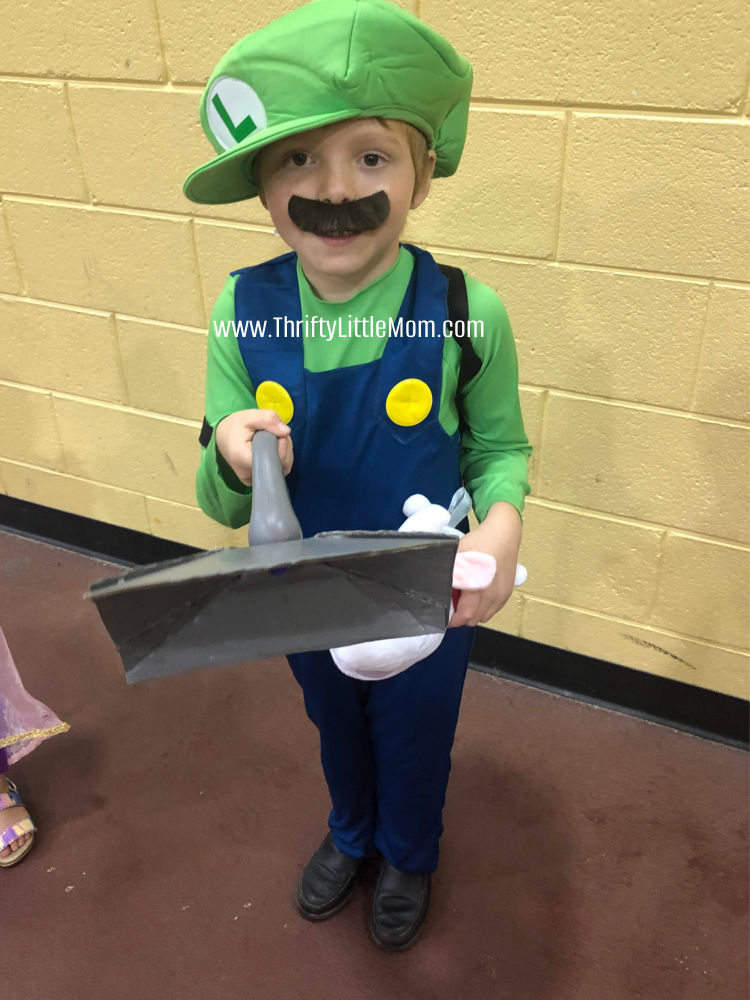
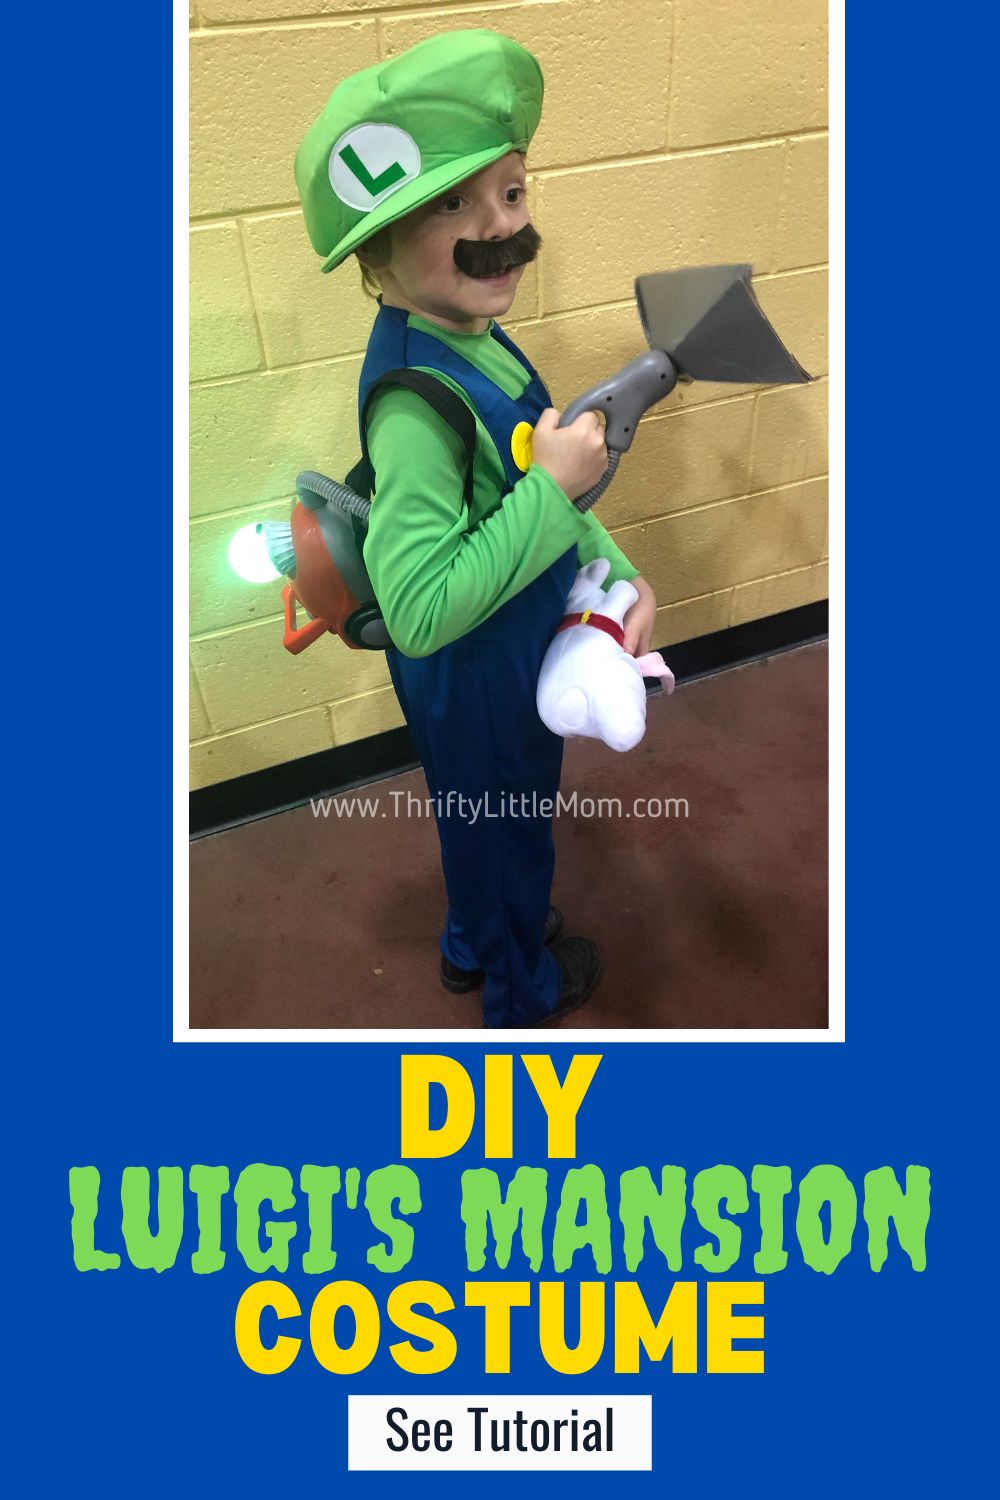
DIY Luigi’s Mansion Costume For Kids
My son is obsessed with the Luigi’s Mansion game on his Nintendo. So a few years back, he begged me to not only be Luigi for Halloween but to make him the Luigi’s Mansion costume specifically.
Warning:
Let me start this post by saying that if you are a Luigi’s Mansion SUPER FAN, I’m going to need for you to realize that I’m a mom of 3 kids slapping this shit together as quickly and thoughtfully as I can. It’s possible that I screwed up some crucial detail that you would find meaningful, including which Poltergust model this is. So note that this is simply for ideas and not for accuracy.
I don’t play the game. I’m not into live-action role-playing. This is a costume for a kid. If you don’t like it, move on to another tutorial that does it for you.
In this post, I’ll show you how I took an ordinary Luigi costume and transformed it into the Luigi’s Mansion Costume with a DIY homemade Poltergust 3000 vacuum accessory.
Let’s go!
See Luigi’s Mansion costume supplies I got off Amazon to help with this project in the black box below:
- Nintendo Super Mario Brothers Luigi Classic Boys Costume
- Brown Shoes or Boots
- Little Buddy Polterpup 7″ Plush (Fun Accessorie)
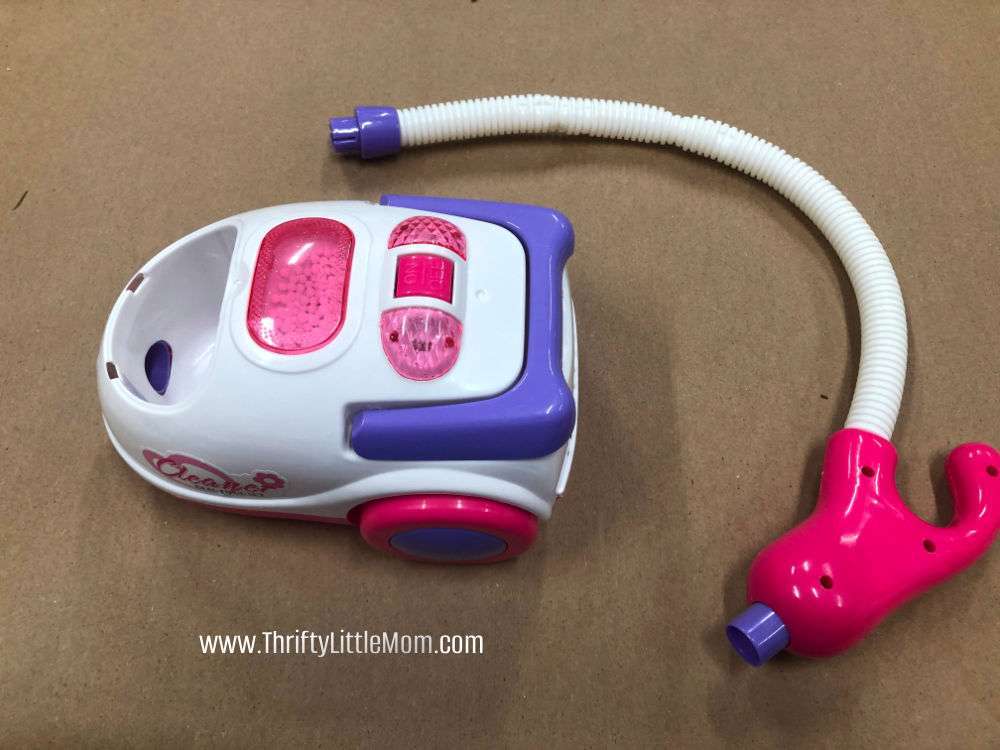
- Kid’s Toy Vacuum ( To Make the backpack A.K.A The Poltergust 3000)
- Red Spray Paint
- Grey/Silver Spray Paint
- Black Acrylic Paint
- Hot Glue & Gun
- Battery Operated Light Bulb
- Heavy Duty Poly Strap Fabric
How I made the Poltergust 3000 For this Luigi’s Mansion Costume (Luigi’s Vacuum Tutorial):
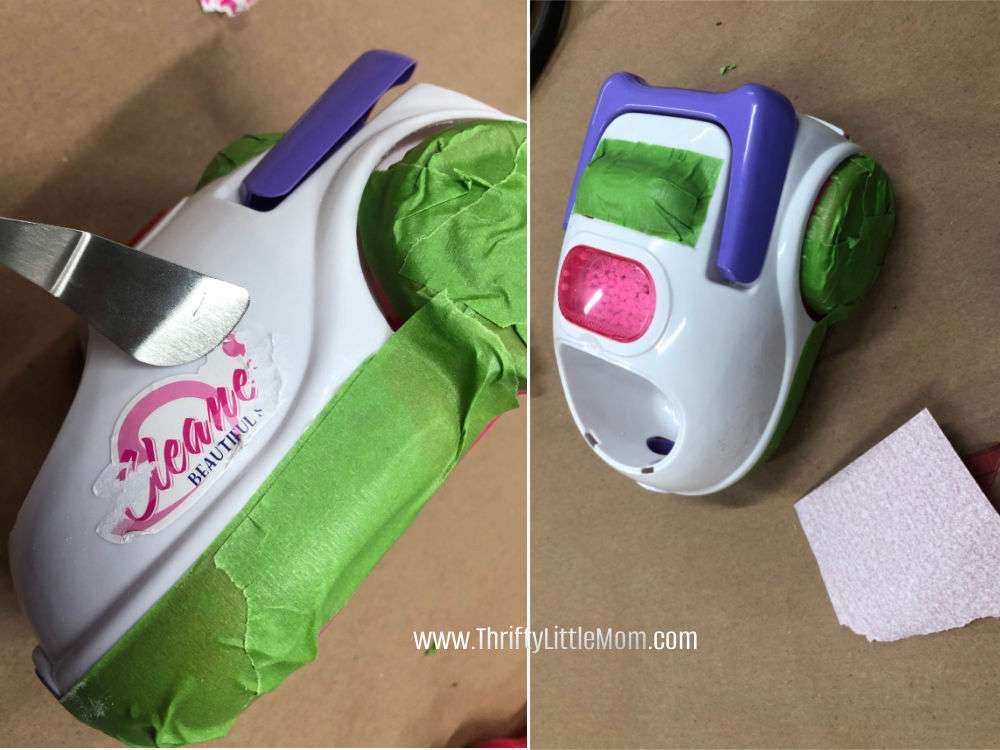
Step 1: Prep
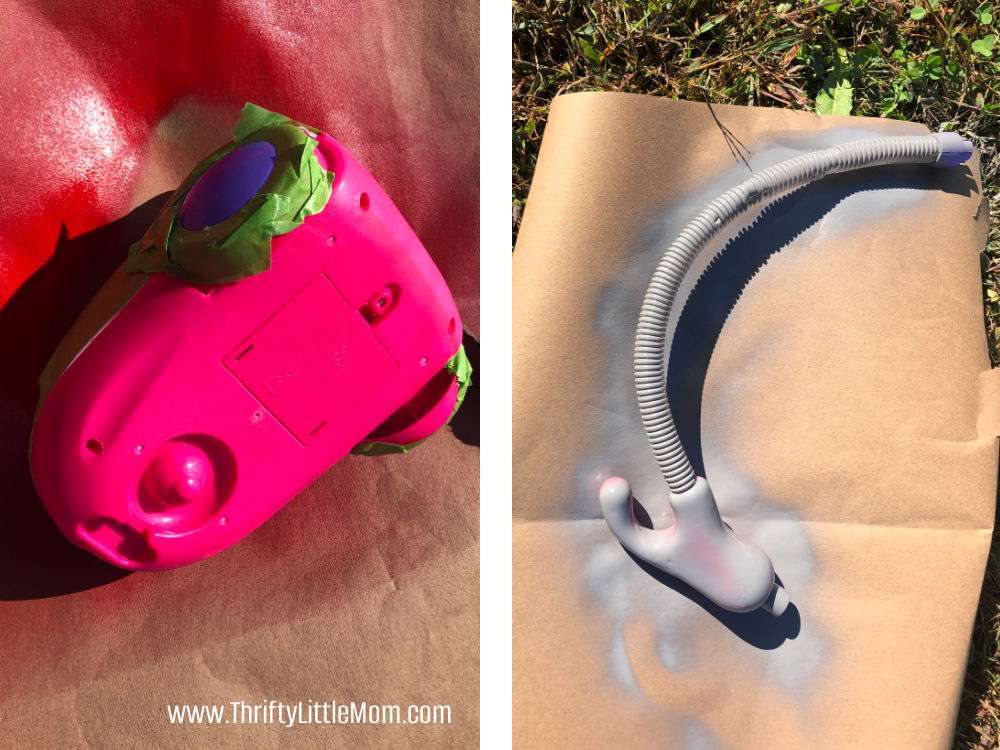
I took the toy vacuum apart to prep it for spray paint.
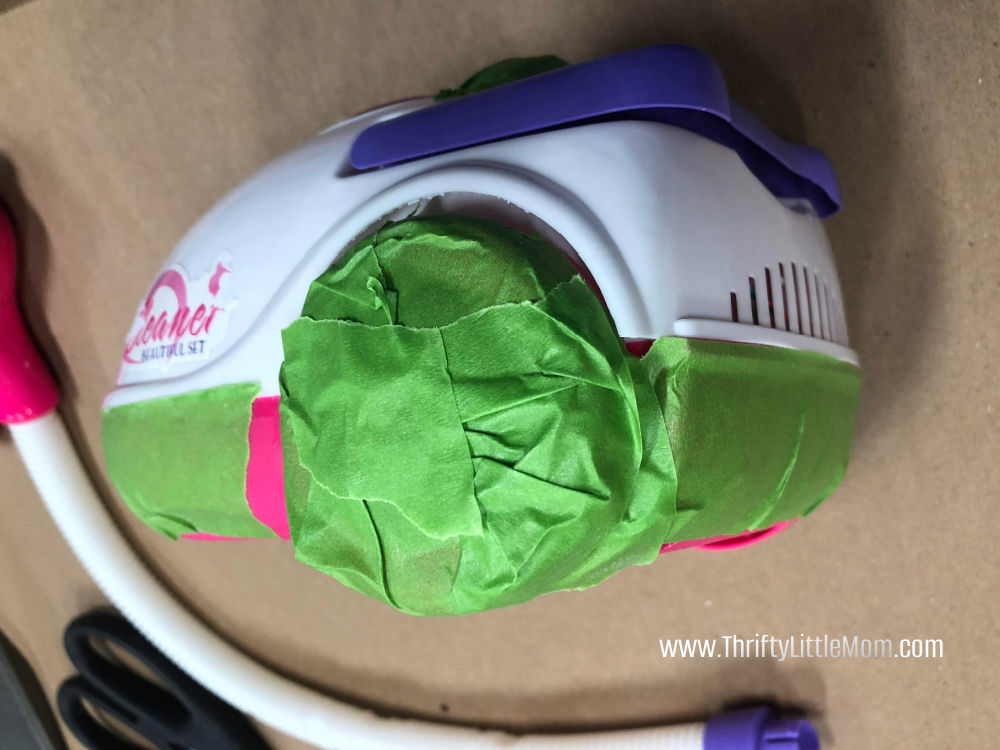
Step 2: Tape it
I applied painter’s tape to the areas of the Poltergust 3000 I didn’t want to spray paint red.
Step 3: Clean & Sand
- I used Goo-Gone (or you can use window cleaner) to remove the toy stickers.
- I used light sandpaper to roughen up the surface so that the spray paint would adhere (I wore a dust mask as I had no idea what these toys were made out of).
- I cleaned the dust off before I took it outside to paint it.
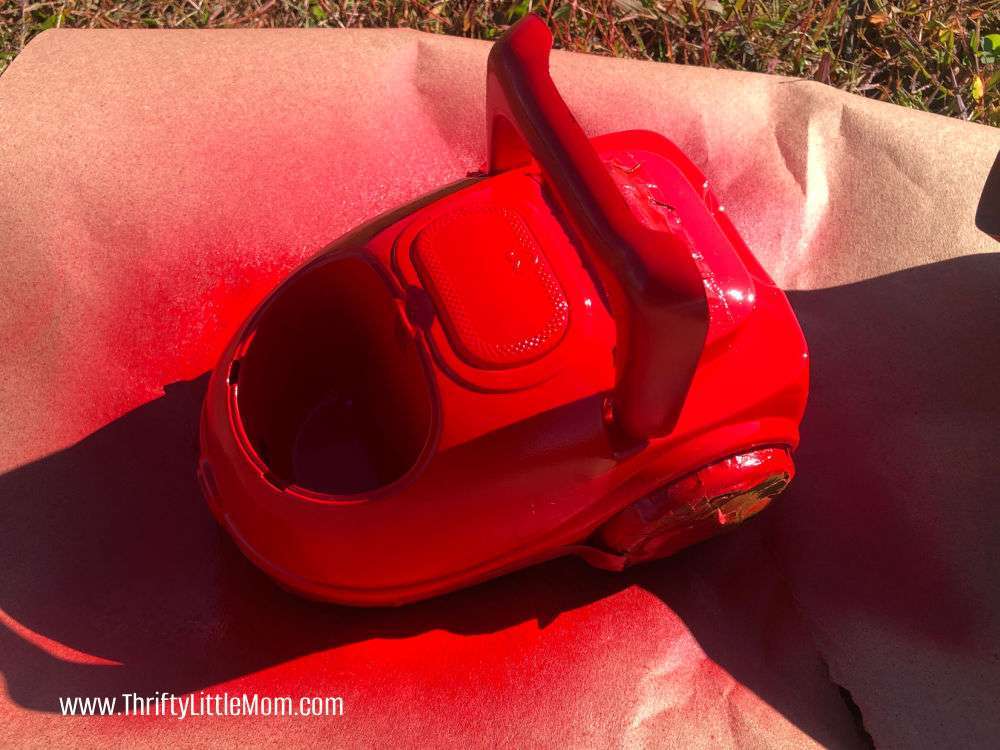
Step 4: Spray the Red Side.
- From all the cartoon images I looked at, it appeared that this Poltergust version had a red top and silver bottom.
- Therefore, I taped up the bottom so that after the red paint dried, I could spray the bottom silver/grey.
- I put down some butcher paper or cardboard and got busy spray painting several layers of red paint onto my DIY Luigi’s Mansion Costume backpack.
- I let this dry according to the instructions on the back of the paint can.
- I layered this until it looked solid red on the outside.
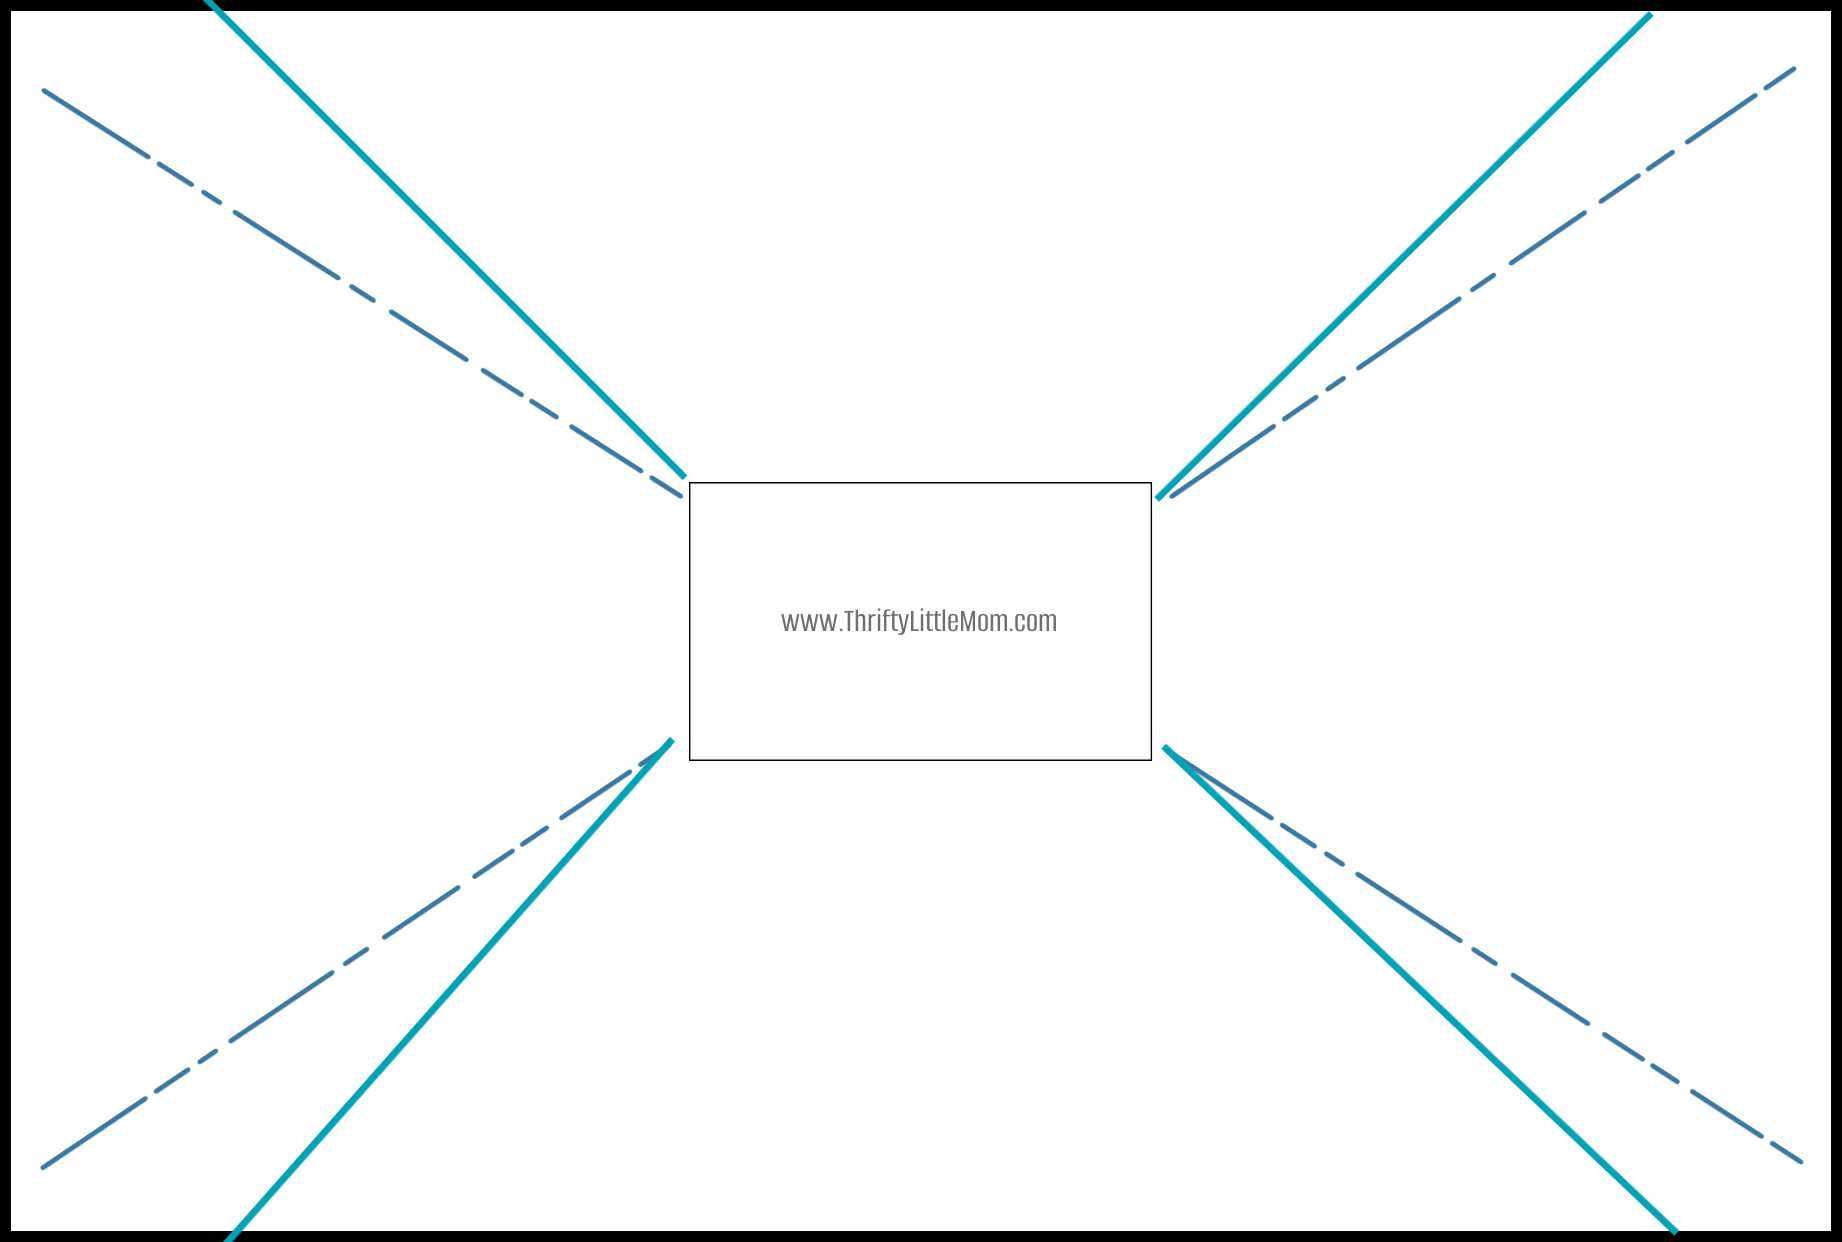
Step 5: Make the Poltergust 3000 vacuum wand attachment.
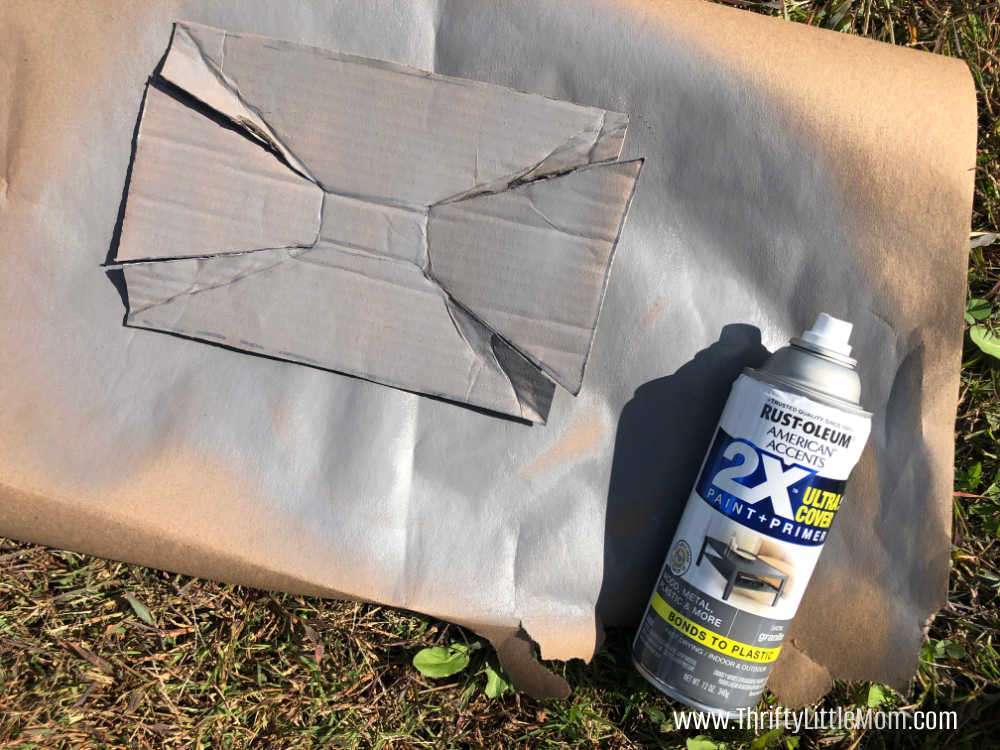
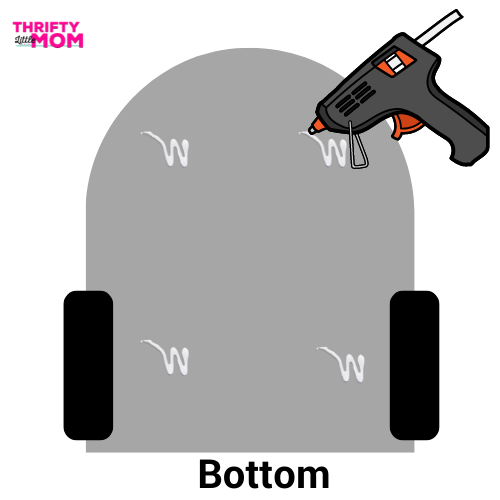
- I made a cover for the suction end of the Poltergust 3000 using cardboard.
- Take a look at the shape of the cover that I cut. Just to reiterate- I’m a writer, not an engineer, so the diagram I included is just to make the shitty cardboard folds easier to see 😂.
- I then spray painted this silver.
- Once this was dry, I cut a hole in the center and hot glued this cardboard piece over the end of the hose.
- I then folded the cardboard along the lines and hot-glued those sections down.
Step 6: Paint the bottom.
- I removed the tape from the bottom of the toy vacuum after the red paint dried.
- Then I proceeded to spray paint the bottom grey.
- While that dried, I started painting the hose attachment grey.
- Once each piece has a solid coat of grey, you are ready to move on.
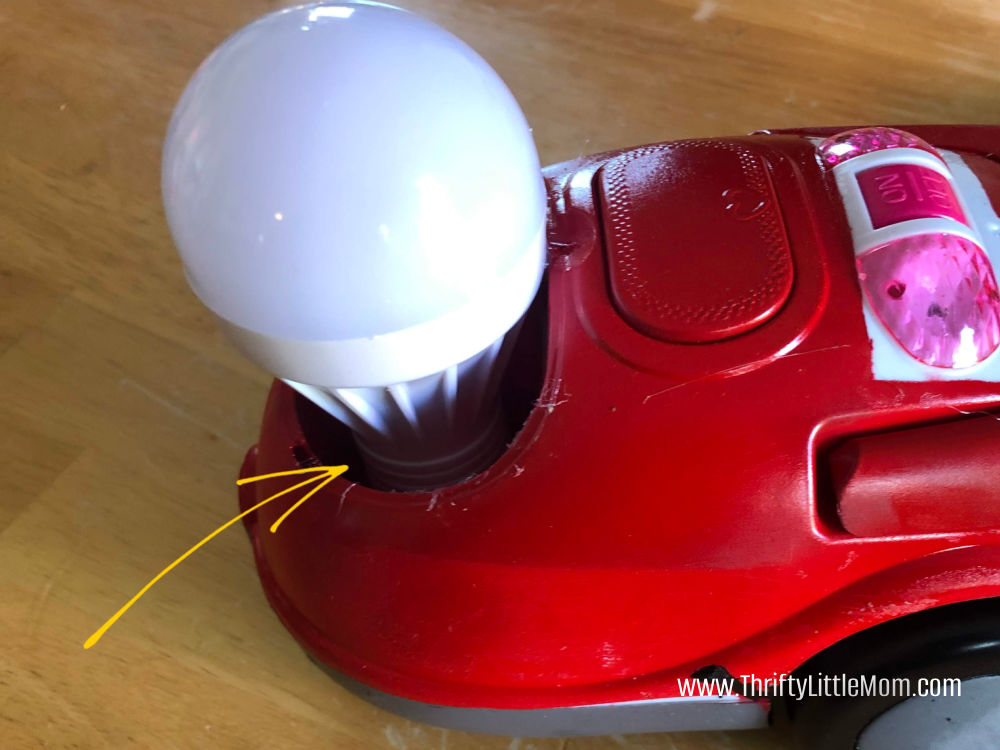
Step 7: Add the bulb.
This is a battery-operated light bulb that I ordered on Amazon. These have a flat base. I put the battery in the bulb, attached the flat base, checked that it worked, and then hot-glued the plastic base of the bulb light to the inside of this compartment on the toy vacuum.
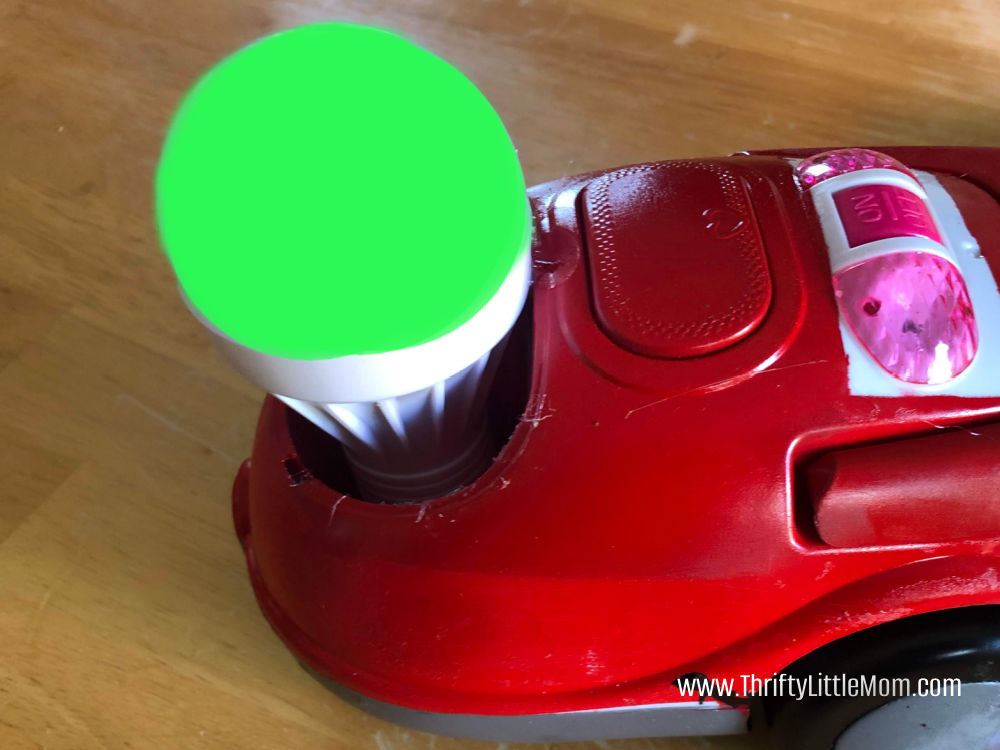
I decided to paint the outside of the bulb with a coat of glow-in-the-dark green acrylic paint to give it that fun look of the Poltergust 3000 while also serving as a backup glow in case the battery died while we were out trick-or-treating.
Step 8: Attach the backpack straps.
To keep this simple, I went down and got about 2 yards of Heavy Duty Poly Strap to make the two straps my son put over his shoulders. With your kid, you’ll want to measure how long the straps need to hold the Poltergust 3000 up on your little Luigi’s back.
Once I had an idea of how much cord I needed, I cut it to size, and I hot glued (or try Gorilla Super Glue) the ends of the straps to the back of the vacuum. I did my best to make some diagrams below that were visual, as I must have been finishing the costume and forgot to take pictures.

Once these parts are done, you are ready to go with your DIY Luigi’s Mansion Costume for kids!
Before you go, be sure you check out some of my other costume posts!


Kim Anderson is the organized chaos loving author behind the Thrifty Little Mom Blog. She helps other people who thrive in organized chaos to stress less, remember more and feel in control of their time, money, and home. Kim is the author of: Live, Save, Spend, Repeat: The Life You Want with the Money You Have. She’s been featured on Time.com, Money.com, Good Housekeeping, Women’s Day, and more!